Thursday, December 20, 2012

In Hyper-Drive Elf Mode

Christmas is right around the corner. It's been a bit quiet on the blog front as I've been racing to finish projects for Christmas. I have one last quilt to bind today or tomorrow and then a couple pillows to finish by Christmas Eve. I had high hopes to get some zipper pouches done for my coworkers for Christmas and to celebrate my 10-year anniversary with my company, but those will have to wait and be New Year's gifts instead.

I've been a busy little elf, but I can't show you most of the projects I've been working on since the recipients read this here blog. But, I did make a few pillowcases for my family, and since some of them have been gifted, I think it's pretty safe to share them.

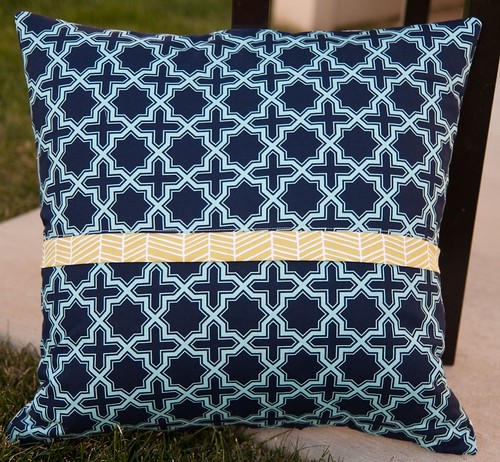
I used Kerri's magic pillowcase tutorial to make these, and let me just say that it really is magical!

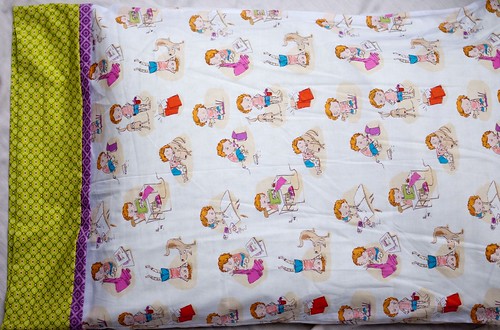
I made this Crafty Chloe pillowcase for The Middle's 4th birthday back in October.

Pillowcases

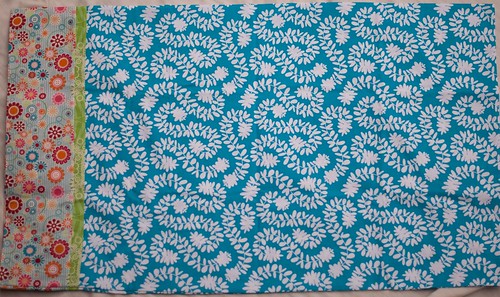
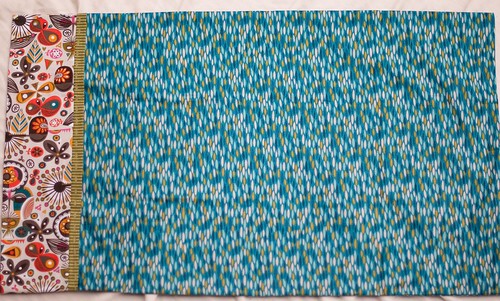
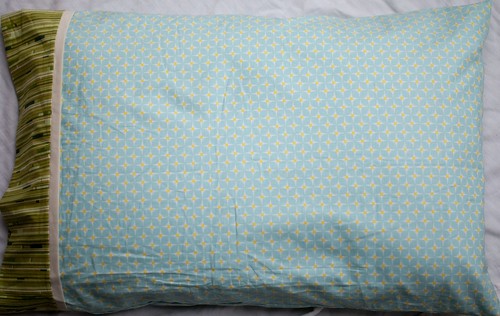
I cut the fabric wrong for these next three pillowcases - oops - but I think they'll still work fine.

Pillowcases

Pillowcases

Pillowcases

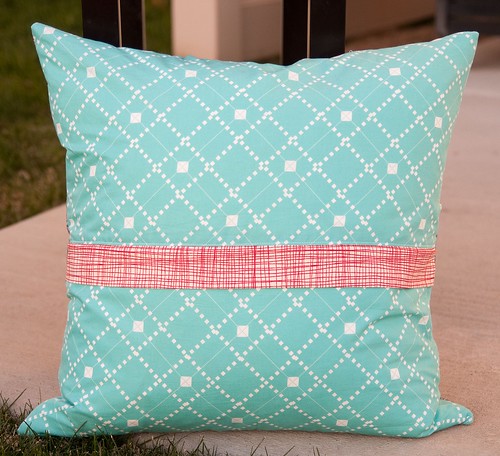
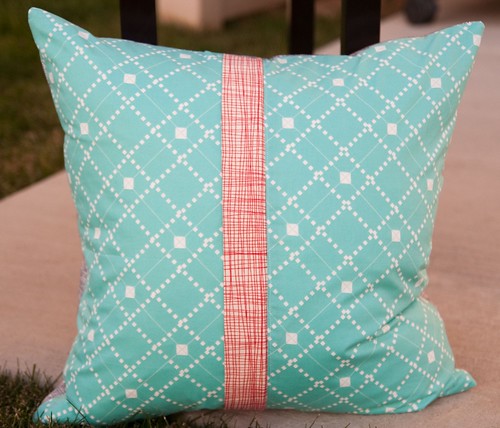
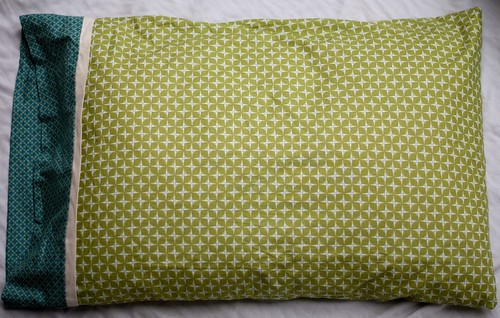
And I made these last two right before Sewing Summit. The colors blend really well with my FFA2 bed quilt. The mister claimed the second one for himself. (It's my favorite too, so sometimes I steal it.)

Pillowcases

Pillowcases

Speaking of pillowcases, if any of you locals are heading to the SLMQG social tonight, I have a few extra yards of fabric donated by Riley Blake if you'd like to make some pillowcases to donate to Sandy Hook Elementary, which is being organized by Quilter's Corner, a local CT quilt shop (details here). Thanks to Barbie for hooking us up!

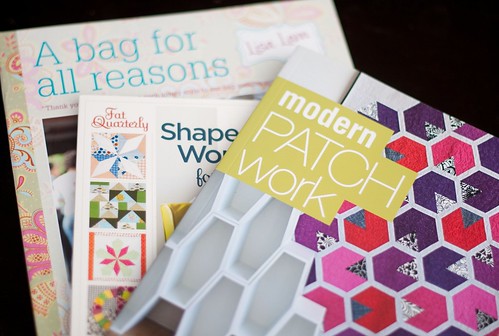
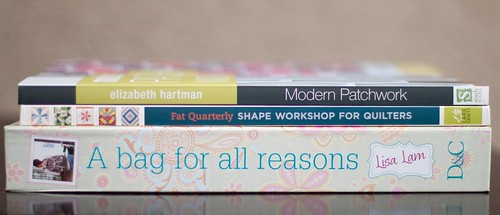
And one last random item. Whether or not you've been following along in the Ruby Star Wrap-Along, I wanted to make sure you're aware that Sew, Mama, Sew! is hosting a contest on their blog in conjunction with the wrap-along. If you've made a project from the Ruby Star Wrapping book, you can enter it in their contest to win some pretty amazing prizes. Melody Miller and Sukie will be judging, which is even cooler!

Merry Christmas, everyone! I'll be back after the holiday to share the projects I've been working like mad to finish!

Saturday, December 8, 2012

2012 Tribute to Sew Beautiful Bee - I'll miss you ladies!

I finished up my last bee block of 2012 the other night. I'm kind of sad about it being my last bee block, but happy with how it turned out. Lee sent a gorgeous palette of solids to make these 16.5" unfinished blocks so she can make a quilt like Rita's Chicopee Giant Vintage Star Quilt.

Sew Beautiful Bee November Block for Lee

After making blocks comprised of half square triangles (HSTs), I always say I need a break from them. Without fail. But, in this block, there were only six HSTs, trimmed down to 4.5" - totally doable. And I didn't get sick of making them. I may need to make myself a quilt like this one of these days.

As I finished up Lee's block, I thought back over the year and put together this mosaic of blocks that I made and received in 2012 through the Sew Beautiful Bee. Several of us are not continuing on with the bee next year due to other commitments. I'm sad to see our group disband, but understand that all of us have full, busy lives. We plan to keep our connection alive though by having a swap sometime next year, and of course we'll all be keeping tabs on each other through blogs, Flickr, and Instagram.

It's been such a joy getting to know all of you girls over the last two years. I wish you all good luck in your future endeavors!

2012 Sew Beautiful Bee Tribute

I'm finishing up a couple quilts for Christmas and then I hope to finish up my Gradated Mod Mosaic quilt that these ladies helped me put together. It'd be pretty amazing if I finished a bee quilt in the same year that I started it!

Thursday, December 6, 2012

2012: Year of the Fabric Tracking

After Christmas last year, I decided I wanted to start tracking my fabric. See what comes in and goes out. Angela, one of my fellow Sew Beautiful Bee mates wrote a post about tracking fabric and I wanted to see how tracking my fabric may affect my purchasing decisions. Here's a snapshot of my simple spreadsheet.


I'd like to call your attention to the section that lists my totals.


Holy crap. Nearly 273 yards of fabric. That I bought. This year. That's crazy. That total does include fabric that I received as gifts and didn't pay for. But still. 273 yards! (I tried counting my existing fabric when I started tracking, but I only got through one drawer - hence the 301 yards in my total stash.)

The other total that I want to point out is the total cost. This amount includes the price of the fabric plus shipping and additional sales tax for online purchases. I am a pretty thrifty gal and usually will only buy fabric if it's on sale. If I can't find the fabric that I want on sale, then I buy it online for the best price. I seldom shop at brick and mortar stores. Maybe 15-20% of the time.

Considering the amount of fabric I stashed this year, I was pleased to see that over 160 yards LEFT my stash. That's pretty good in my book.

Seeing these totals has made me realize that I shouldn't buy any fabric in 2013. I'm sure I have well over 150 yards to get through since I had more fabric in my stash before I started tracking my fabric. I also have a boatload of quilts that I've started that need to be finished, such as:

The Middle Child's Quilt
New Nephew's Quilt (like this)
The Mister's Quilt (like this)

I've set a goal for myself to USE MY STASH in 2013! I plan to only allow myself a little leeway in purchasing fabric for quilt backs. But, another goal I have for 2013 is to make more pieced backs (instead of my typical lazy buy-a-sheet-to-back-a-quilt way), so hopefully that'll eliminate the need for me to buy much fabric for backings.

So how about it? Who's with me?

Saturday, November 24, 2012

Finished Spring Carnival Kona Solids Pillow

At Sewing Summit last month, I started this English paper pieced (EPP) Spring Carnival pillow in Katy's EPP class using a charm pack of Kona cotton solids in the bright colorway. I finished it up just before Thanksgiving, and I must say that I love how it turned out.

English Paper Pieced Spring Carnival Pillow

I wanted to quilt this pillow pretty densely so I pulled out my walking foot and set to work quilting in organic straight lines. After 30 minutes or so (I didn't really time it, but it felt like forever), I had only quilted about a 2-3 inch wide section. Ugh. This was going to take a while. So, I set the pillow aside to work on other, more pressing projects. A few days later, I pulled it out again after freemotion quilting (FMQ) on an apron for my husband's aunt to give my mother-in-law and thought I'd try straight-line quilting with my freemotion foot. Huzzah! It was so fast and slick and awesome! I finished the rest of the pillow in the same time it took me to do those 2-3 inches with my walking foot. Definitely a new favorite FMQ technique that I'm sure to use over and over.


English Paper Pieced Spring Carnival Pillow

For the back, I made another hidden zipper enclosure. I love that the pattern of the back fabric sort of mimics the design on the front. I can't remember the name of this fabric off the top of my head, but I picked it up during Sewing Summit and thought that'd be fitting too. The green zipper flap is Patty Young's Running Stitch in green.

English Paper Pieced Spring Carnival Pillow Back

I've entered this pillow in Pink Castle Fabrics Fall for Solids contest over on Threadbias.

English Paper Pieced Spring Carnival Pillow

Linking up to Kati's At the End of the Hallway.

 
Oh, and I wanted to mention that I survived my first-ever Black Friday shopping experience! My sister has vowed to never go again (once was enough for her), but another sister happily offered to do it again with me next year. I hope you all had a wonderful Thanksgiving and weekend!

Wednesday, November 21, 2012

Breeding Like Rabbits: Two Finished Baby Quilts

It seems like everyone I know is pregnant right now. Or just had a baby. It also feels like I've made more baby quilts this year than in the two previous years that I've been quilting.

First up is a quilt for my friend and neighbor, Amy. She is due to have a little girl in a week and a half. Some people who are expecting girls are in one of two campgrounds: "I love pink" or "I hate pink." She's in the "I love pink" camp (hot pink to be exact). I just so happened to have the perfect girly hot pink fabric waiting to be made into a simple patchwork baby quilt.

Baby Quilt for Amy

I received a fat quarter bundle of Joel Dewberry's Heirloom in the Sapphire colorway for Christmas last year. I love the colors, but tend to shy away from making overly girly quilts for myself/my home because I want all the quilts I make to be equally loved by my family. Since there are two boys in the house, I wasn't sure a quilt with this fabric would be loved as much. So, I was really happy to cut some of it up for this quilt. And, I still have plenty of fabric left over for some more girly projects, maybe a couple patchwork skirts for my girls.

As luck would have it, I happened to have a hot pink bed sheet on hand, which I used for the backing. (I know I'm lazy when it comes to making backings, but that's something I'm going to try to work on in 2013.) I used the sheet for the binding too, but added a few small pops of Heirloom. I straight-line quilted on both sides of each seam. It measures about 36 inches square.

Baby Quilt for Amy

Next up is a baby quilt for another friend who's having a boy mid-December. I made a quilt for her daughter when she was born as well. This time I used a couple charm packs of Riley Blake's Super Star. I forget sometimes that the amount of fabric in precuts varies by manufacturer, so I added a border to make this quilt a bit bigger. It measures about 34x39 inches.

Baby Quilt for Emily

I used this dusty blue solid (Kona, but I'm not sure what color) for the backing and binding, adding a few more pops of Super Star for fun. The quilting is organic straight-lines on both sides of each seam.

Baby Quilt for Emily

For those of you in the states, I hope you have a safe Thanksgiving weekend! I'm trying to decide if I want to brave the crowds and pick up some Pellon batting (major sale) at Joann's today.

Sunday, November 18, 2012

Paper Pieced Kaleidoscope Tutorial

Way back in March, I saw this stunning quilt top on Rita's blog. I was absolutely awestruck and mentally jotted down "paper pieced kaleidoscope quilt" on my to-make list. Fast forward to round 9 of the Pillow Talk Swap (PTS9) when I was partnered with Adrianne of Little Bluebell. I've been a big fan of Adrianne's for a while now and really wanted to make something that she'd enjoy. In her description of what she'd like to receive, she listed simple, all-over design as being something she liked. Almost immediately, Rita's quilt top popped into my head and I came up with this pillow version. I've put together a little tutorial on how I made my PTS9 pillow. Let me know if you have any questions.

First, you need to determine the size of blocks you want to make. I wanted 4" finished blocks so I could easily make them work with a 16", 20", or 24" pillow form. You'll need to adjust the size of you paper if you want larger or smaller blocks.

Start with a 4x4" piece of paper. Line your paper up on your cutting mat and then begin drawing the following lines by rotating your ruler around the square.

Top left to bottom right - one inch in from both sides:

Foundation Paper Pieced Kaleidoscope Block Tutorial

Top right to bottom left - one inch in from both sides: (this image also shows my drawn line top left to bottom right of one inch down and one inch up)

Foundation Paper Pieced Kaleidoscope Block Tutorial

Top right to bottom left - one inch down and one inch up:

Foundation Paper Pieced Kaleidoscope Block Tutorial

Your finished block should have four criss-crossing lines on it and should look like this:

Foundation Paper Pieced Kaleidoscope Block Tutorial

Next, align your ruler with one of the drawn lines (it doesn't matter which one), and cut the square into two halves.

Foundation Paper Pieced Kaleidoscope Block Tutorial

Then, paper piece your desired fabrics onto one half of the paper. Since we used a 4" square, which is our finished size, make sure you have plenty of fabric on the outside edges of the paper for trimming. For paper piecing basics, check out this post or do a web search for "paper piecing" (not to be confused with "English paper piecing") - there are plenty of posts and videos out there to help you if you've never tried paper piecing before.

Foundation Paper Pieced Kaleidoscope Block Tutorial

Repeat with the other half of your 4" square.

Foundation Paper Pieced Kaleidoscope Block Tutorial

Now it's time to square up both halves. Place your 1/4" mark on your ruler on each edge of the paper and trim. This is your seam allowance.

Foundation Paper Pieced Kaleidoscope Block Tutorial

Each trimmed half should look like this:

Foundation Paper Pieced Kaleidoscope Block Tutorial

Foundation Paper Pieced Kaleidoscope Block Tutorial

Align your two halves so the long diagonal edges of each paper match up, right sides together. Stitch just along the edge of the paper. (Sorry, I forgot to take a picture of this.)

Press your seams and remove the paper on the back. Here's what your finished block will look like:

Foundation Paper Pieced Kaleidoscope Block Tutorial

You can then repeat the above steps to make as many blocks as you like. Arrange the blocks as desired. Sew the blocks into rows and the rows together to make a pillow or quilt top.

PTS 9 - Paper Pieced Kaleidoscope

For my PTS9 pillow, I made 16 blocks and laid them out in a 4x4 layout. I then added a thin white border and then a thicker border to achieve my desired pillow top size.

Finished Pillow Talk Swap Round 9 Pillow

I was really pleased with how this pillow came together. I really want to make a quilt using this technique, but with larger block sizes. Perhaps that's something to put on 2013's to-do list.

Friday, November 16, 2012

The "Holy crap!!! Do you know what this means?!" Pillow

The Monday before Halloween was pretty much the best Monday I've ever had. I woke up in a good mood, ready to start the week. (That never happens.) I even caught myself humming when I walked into the office. I don't remember anything about the work day being stellar, but I guess that'd be too much to hope for.

Rewind a couple weeks earlier to Sewing Summit. I met Kelly from KelbySews the first day. She's adorable and funny, by the way, and I absolutely love her little accent. Anyway, some time during the weekend, she boasted to me that she knew who my partner was in the Pillow Talk Swap. The little tease wouldn't give me any hints, but the fact that she said that stuck in my head.

So, back to the Monday before Halloween. I was perusing Flickr and Instagram and doing a little blog reading during my lunch break. My most favorite pillow posted in the Flickr group for the swap had been shipped out and the blogger mentioned that it would arrive at her partner's house that day. Then, on Instagram, I noticed that Kelly had posted comments a lot on this same blogger's Instagram pics. My wheels started spinning and I was hoping hoping hoping that the pillow I really wanted would actually arrive at my house. I was trying not to get my hopes up all the way though because I'm not usually a lucky person when it comes to this kind of thing and I didn't want to be all let down if the pillow went to someone else's house.

I finished out my work day and headed home. The mister got off work before I did and grabbed the mail before I had a chance to. When I walked into the house, I saw a package on the counter, but I had ordered some fabric and thought that was probably it. When I looked at the sender though, this is what I saw:

holy crap_do you know what this means

I immediately took a picture and posted it to Instagram with the caption: "Holy crap!!! Do you know what this means?! #bestpillowtalkswappackageever !!!"

PTS9 Pillow Received

I'm sure you all know who Angela Pingel from Cut to Pieces is. She's amazing and I've been a huge fan of hers since I started quilting. Her work is absolutely wonderful and I am so blessed to have something she made in my home.

PTS9 Pillow Received

If you haven't already, head on over to her blog and read what she wrote about making things for swaps and the inspirations she has. Reading what she wrote about making this pillow JUST FOR ME really made the pillow I received that much more special.

PTS9 Pillow Received

Thank you, Angela, from the bottom of my heart! The pillow you made is already getting tons of love and will continue to get a lot more!

Wednesday, November 14, 2012

Elephant Softie for the Ruby Star Wrap-Along

Five years ago, I read a blog post about cloth diapering. Before then, my only knowledge of cloth diapering was what my mom used on her kids - you know, safety pins and plastic pants. After reading the post, I was converted to cloth diapering and felt great pride in conserving and reducing my carbon footprint. After thumbing through Melody Miller and Alison Tannery's Ruby Star Wrapping book at Sewing Summit, I felt that same sense of pride and purpose and wanted to wrap my Christmas gifts this year in reusable materials to limit how much my family contributes to the landfill this Christmas. So, when Amy asked me if I wanted to participate in the Ruby Star Wrap-Along, I said, "Heck yes!" I was so excited to try some of the projects for wrapping my gifts this year. The funny thing is that when we got to pick which project we'd like to make, I chose the elephant softie and my four-year-old immediately claimed it for herself. No gifting it to someone else for Christmas. Oh well. At least that's a win in the make-something-my-daughter-loves department.

Melody and Alison offer suggestions for altering each project. I loved the look of the patchwork elephant in the book. As I was deciding on the fabric to use, I thought this Heather Ross penny patchwork print from her Nursery Versery line would be perfect! I used Patty Young's Running Stitch in pink for the pocket.

As a side note: when I finished the elephant, I had this vague memory pop into my head of a show I saw on TV when I was little. There was a patchwork puppy and a patchwork kitty that were fighting and ended up eating each other. Weird. No one I've talked to seems to remember seeing it, so if you know what I'm talking about, let me know so I don't think I'm crazy.

Elephant Softie from Ruby Star Wrapping

I thought the pocket looked like a cute little elephant ear, so I decided to put one on each side.

Elephant Softie from Ruby Star Wrapping

Now my daughter can fill those pockets to her heart's content. Maybe down the road, we'll even use it as her tooth fairy pillow.

Elephant Softie from Ruby Star Wrapping

Remember, you have the whole week to link up a project from the book. We're giving out a $40 gift certificate to Gelaskins (I SO want to order myself one of these!) and an awesome Melody Miller fabric prize pack from Drygoods Design Online!


Gelaskin Gift Certificate

Drygoods Design

Drygoods Prize Pack #1

If you've missed any of the stops so far on the wrap-along (which you'll definitely want to check out!), here's the schedule:

11.7.12 - Anna of noodlehead

11.9.12 Amanda of A Crafty Fox

11.12.12 - Elizabeth of Oh, Fransson!

11.14.12 - Brooke of Pitter Putter Stitch (you are here)

11.16.12 - Erin of Two More Seconds

11.19.12 - Jennifer of BettyCrockerAss

11.21.12 - Rochelle of Lucky Lucille


11.26.12 - Elizabeth of Don't Call Me Betsy

11.28.12 - Gina and crew of Bolt Neighborhood

11.30.12 - Ellen of the Long Thread

12.3.12 - Katie of Swim, Bike Quilt

12.5.12 Faith of Fresh Lemon Quilts

12.7.12 Lee of Freshly Pieced

12.10.12 Maureen of Maureen Cracknell Handmade

12.12.12 Sara of Sew Sweetness

12.14.12 Colleen of The Busy Bean

12.17.12 Amy of Diary of a Quilter

12.19.12 Monica of The Happy Zombie

Monday, November 12, 2012

Finished Modern Meadow Spring Carnival Pillow

Some time after Spring Quilt Market, Sukie brought the gorgeous Spring Carnival pillows that Katy gave her to our monthly SLC Modern Quilt Guild meeting. I had seen the pillows on Katy’s blog, but I about died actually seeing them in person. Absolutely amazing – and HUGE! The next day, I printed off the templates and set to work on my own.

Fast forward a couple months to Sewing Summit. Katy taught a class on English paper piecing, and while I already had tried my hand at the Spring Carnival pattern (which is what Katy taught in the class), I wanted to learn from her to make sure I was doing it the right way. I also started a new version and love how the pattern changes based on where you decide to place your fabric.

Here is my first version, which I turned into a pillow that is ready to be gifted for Christmas. I used mostly prints from Joel Dewberry’s Modern Meadow line with the addition of a DS Quilts print (the blue/teal-ish circle). I bought the Modern Meadow fabric ages ago because I really love the large medallion print. I fussy cut those medallions for this pillow.

Spring Carnival Pillow

For the back, I made another hidden zipper enclosure and used more of the JD prints. This really is such a slick way to finish the pillow. I think next time, though, I’ll try offsetting the fabric rather than installing the zipper in the middle of the pillow.
Spring Carnival Pillow

Last month, I added a few more sewing books to my library. I happened to have 60%, 50%, and 40% off coupons for Joann’s and decided I’d use them on books. I usually order things like this from Amazon and get free shipping with my prime account. I seriously scored on these. (You can’t beat getting three books and an Accuquilt die for $50 – although I don’t think I was supposed to get the discount on the die, but I won’t complain!)
New books to add to my library

Sara from Sew Sweetness mentioned the Bag for All Reasons book in her Sewing Summit class. I thumbed through it at the store and there are some really great bag projects in there that I want to make.


Come back Wednesday to see the project I made for the Ruby Star Wrap-Along.

Friday, November 9, 2012

Finished Pillow for Pillow Talk Swap Round 9

As Christmas is quickly approaching, I've been working like a mad woman to get things done. I managed to finish my partner's pillow for the Pillow Talk Swap on Tuesday night. Thankfully, I took pictures yesterday when it was still warm out because this morning's been very wet with rain and snow.

The finished pillow cover fits a 20" pillow form. I made this one a titch bigger than I usually do. I prefer a stuffed look for my own pillows, but thought I'd make it a little bit roomier for my partner. The finished cover measures about 19" square.

Finished Pillow Talk Swap Round 9 Pillow

I used black DMC embroidery floss to hand quilt in the negative space (Kona ash). I really like the added pop it gives the pillow as well as helps showcase the prints I used in the kaleidoscopes.

I'm not sure I can name all the fabrics on the front, but I used various Konas (charcoal, some blue-greens leftover from a Poseidon FQ bundle, and ash), Washi, Metro Living Circles, Summersville, Chicopee, Vintage Modern, and Little Apples.

Finished Pillow Talk Swap Round 9 Pillow

For the backing I used Aneela Hoey's Sweater Check in Aqua from her Little Apples line and Lu Summer's Summersville Weave in Bus for the strip that covers the zipper.

Finished Pillow Talk Swap Round 9 Pillow

I hadn't tried this technique before, but it was so easy! It's sure to become a new favorite pillow enclosure method for me.

Finished Pillow Talk Swap Round 9 Pillow

I used Kona white and a black sketch print from Timeless Treasures to add a border to the pillow front. I really really love that sketch print and want to buy yards more to add to my stash.

Finished Pillow Talk Swap Round 9 Pillow

I'm planning on shipping this pillow off tomorrow with a few extra goodies for my partner.

If you're interested in how I made this pillow, I'm in the process of putting together a tutorial for it, so stay tuned!

LinkWithin

Related Posts with Thumbnails