Showing posts with label drawstring bag. Show all posts

Thursday, August 9, 2012

A few random sewing projects, part 1

As I mentioned in my last post, I've really been enjoying working on some smaller projects that offer instant gratification when I finish them in one sitting. Perhaps this is because I've started so many big quilt projects that are in various stages of completion. Here's a hodge podge rundown of some of the projects I've been working on lately.

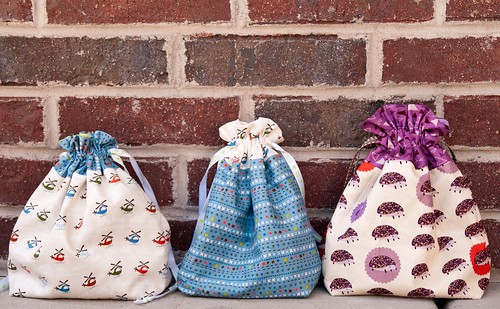
First up are a few drawstring bags using Jeni's tutorial. With three kids five and younger, it's a constant challenge to stay organized out our house. I made a few of these bags to help in our toy-organizing effort. These really are so quick to whip up, especially if you use ribbon as the drawstring. I plan to make many more of these in the near future.

20120726-20120726-DSC_9563

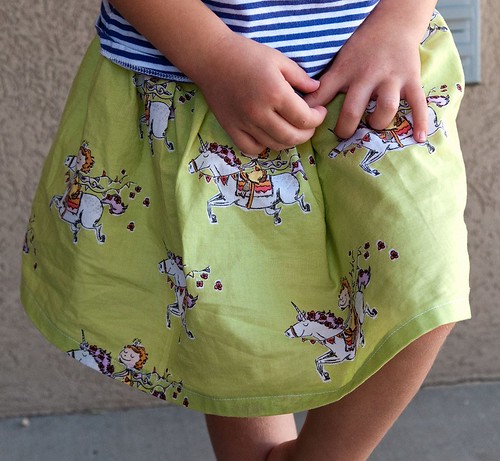
I also sewed up a quick skirt for my daughter using the Crafy Chloe unicorn fabric by Heather Ross that is available at Hancock's. My daughter is pretty much obsessed with wearing skirts on a daily basis. I figured rather than buying more skirts since so many if hers have gotten too small (she's growing like a weed), I'd just make some.

20120726-20120726-DSC_9559

This one isn't lined, but it's also meant to be a play-day skirt. I've since made another skirt just like this one using some DS Quilts and Lizzy House fabric that she can wear to church. I wanted it to be lined, but didn't want to "waste" good fabric on the lining, so I made it reversible instead. I still have to take pictures of that one, but I'll show you what I'm talking about when I do.

20120726-20120726-DSC_9557

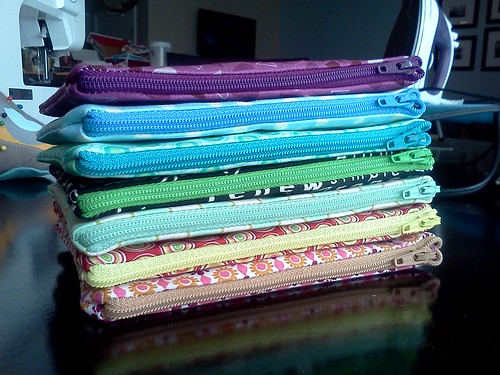
Now, I don't know about all you ladies, but when it comes to "that time of the month," I usually just carry tampons and such loosely in my purse. I remember in jr. high and high school being so embarrassed when I needed to use the restroom and tried so hard to be discreet. I decided it was time to have a cute little pouch I could house those supplies in and stick in my purse, making it easier to just grab the pouch rather than stick a tampon in my pocket and head for the bathroom. While I was at it, I made a few more for my nieces so they can feel a little less self-conscious too.

small zippered pouches

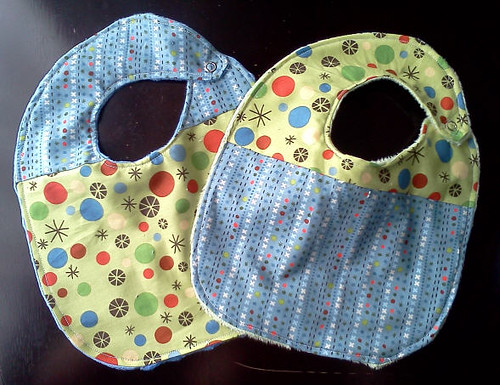
Last month, Jessica (Euphoria on Flickr) invited my to participate in a charity sewing event, Bibs for Babies, that she was organizing. The Operation Shower non-profit group gives baby showers to military families, helping to raise spirits despite deployment. She asked for everyone participating to make two baby bibs that she can donate to the cause, hoping to collect 100 bibs. This was a first for me, and while there's definitely room for improvement, it was nice to use some materials I had on-hand as well as contribute to good cause.

Bibs for Babies

Well, that's the rundown for now. Check back Saturday for a few more projects I have in the works.

Wednesday, January 25, 2012

WIP Wednesday: My First of 2012

I have a slew of items on my to-do list that are in various stages of completion. I really really really want to get them done so I can work on one of my 2012 goals: working on one project, start to finish, before beginning anything new. So, here are a few WIPs and a couple finishes for this week to get the ball rolling.

In Progress

1001 Peeps Supernova

My local bee mates helped me put the blocks together for this one back in August before I had my baby. I made two more blocks earlier this month and then pieced the top together. I love that mitered border! Read more about this quilt top here.

My Supernova Quilt Top

Quilt for my mom

I've cut most of the printed fabric for my mom's quilt, but need to finish cutting about three more fat quarters and then I'll get started on the solid. Her quilt will be really similar in design to my dad's quilt.

Quilt for my oldest daughter's bed

I started this quilt back in the summer in preparation for moving my middle child out of the crib and into a bunkbed. I have the top half-way pieced and just lost motivation in getting it done. I WILL finish it up.

Quilt for another sister

I started a quilt for my sister, who's right above me in the family line, forever ago. At least a year ago. Maybe more. Despite it being red, black, gray, and white (I'm not a huge fan of the red and black color combo), I really love the blocks. I'm determined to get this one done at least before the year is half over.

Finished

Drawstring bag

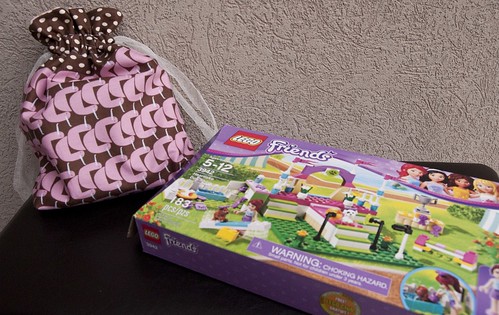
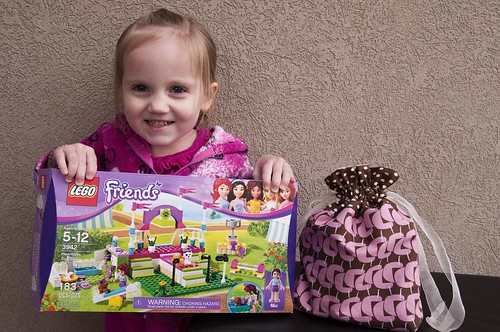
I made this bag on Sunday to hold my daughter's first set of Legos.

Drawstring bag for my daughter's Legos!

Appliqued Name Pillows

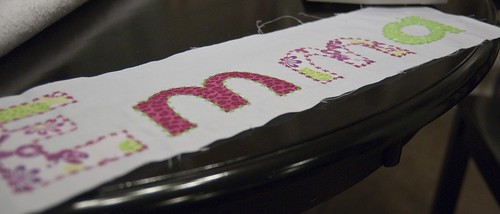
I spent Saturday appliqueing letters onto fabric for pillow fronts. My sister-in-law asked my sister to make 16 pillows for girls in her church who are advancing to the Young Women program. Since my sister has been watching my kids for me, I told her I would help out with the pillows. I appliqued eight of the names on Saturday. And I am sure glad to be done!

Appliqued name

Bee Block for Colleen

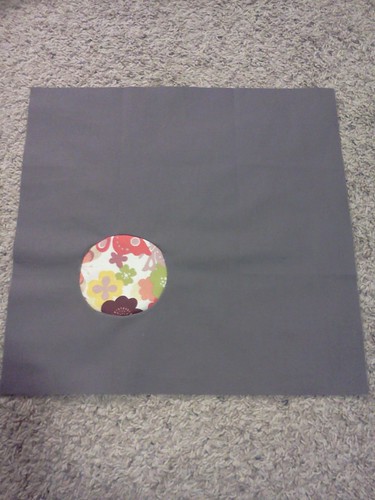
Colleen asked for circles way back in September for our local bee, but she let me have an extension since I had my baby and didn't make it to a couple meetings afterward. This circle piecing was difficult for me. I need to give the block to Colleen on Saturday, so if I have any time before now and then, I'll try adding another circle or two. I think her quilt is going to turn out awesome, especially because she is hand-quilting around each circle with different color thread.

Circle for Colleen

I'm hoping to be more productive starting next week. I've rearranged my work schedule, which starts soon, and I think it'll give me a little more time for sewing!

Linking up to:

WIP Wednesday at Freshly Pieced

Sunday, January 22, 2012

Drawstring bag, an oops, and a bit of a rant

The mister and I are always trying to find ways to help our middle, impressionable daughter know that there's more to life than pretty princesses. She's three so that's pretty much all she cares about most of the time. In fact, we had a really hard time coming up with Christmas gifts for her that were appropriate for a three-year-old girl, but not just "pretty" and pointless. We've made the decision not to buy Barbies for her and we're trying to limit the influence of dolls and being pretty and dresses (not so successful there) and...and...and...

The mister is also an avid magazine reader. Bloomberg Business had an article in a recent issue about Legos for girls. We were pretty excited and it was interesting to hear what changes were made to the legendary building blocks.
"...There's a Lego phase for boys that's as consuming as the princess phase. But unlike tiaras and pink chiffon, Lego play develops spatial, mathematical, and fine motor skills, and lets kids build almost anything they can imagine, often leading to hours of quiet, independent play." -Bloomberg

While at WalMart last night, the mister spotted a few sets of these Legos for girls and brought some home for her. Thankfully, the one he chose for her was the dog show set rather than the salon (another influence of physical appearance and feminine stereotypes - ugh - but I'll save those rantings for another day).

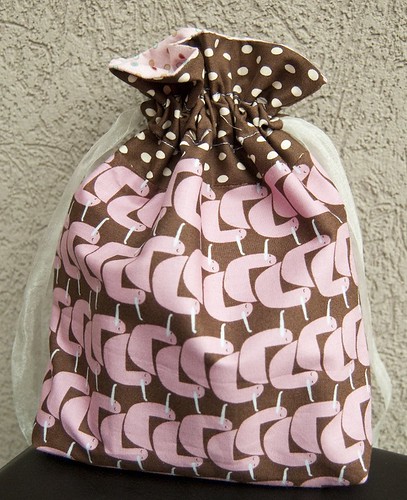
So now I'll get to the point of this post. After taking the Legos out of the box last night, I quickly realized that we needed a bag to store them in. I've been wanting to try Jeni's drawstring bag tutorial for a while now and this was the perfect time for it.

Drawstring bag for my daughter's Legos!

I made the mistake of not reading through the instructions all the way before cutting the fabric. Otherwise I would've seen how to cut my directional fabric (the ducks) the right way. Oh well. I think having the ducks sideways gives the bag a nice horizontal stripe look.

I also need to stop being lazy and actually change out my thread to a matching color when it'll be visible from the outside. Seriously. That white thread really sticks out against those dots.

Drawstring bag for my daughter's Legos!

The bag came together so easily. I took Kati's advice and used ribbon instead of making the drawstrings to save time. Although, the only ribbon I had on hand was this sheer stuff that I would rather not have used. Now I want to cut out fabric for a few more bags to organize my son's toys too.

So despite my mistakes in constructing the bag, I think it was a hit.

Drawstring bag for my daughter's Legos!

And if any of you have strong feelings about the constant influx of negative media bombarding girls of all ages, feel free to tell me how you feel.

Friday, July 9, 2010

Rainy Day Book Bag and Pillow Tutorial

A niece of mine is turning 10 this month. Tonight is her pink, girls only sleepover party. Since she loves to read (and since she obviously loves pink), I made her a rainy day book drawstring bag and pillow to match. The idea is that she can go to the library on a rainy day, bring her books home in her drawstring backpack, then curl up with her pillow and read the day away.


I picked up this Alexander Henry fabric at Joann's a while ago for a skirt for me and a quilt for my daughter. I didn't care for the skirt and never got around to making the quilt. But, luckily enough, I had plenty of fabric to work with for this pink birthday gift.

I don't have any process photos because I was trying to get these done in a hurry last night (can you say procrastinator?). But, I'll walk you through the process. Note that the images below don't correspond to the steps of making your own bag.


To make a drawstring bag of your own, you'll need:

1 yard quilting cotton weight fabric (this serves as the outside of the bag and the lining)
2 yards cording (for the drawstring)

If you want to use fabric for the drawstring instead of cording, you'll need 5 extra inches cut with your yard of fabric (so 41 inches of fabric).

Square up your fabric, then cut 4 2.5-inch strips the width of the fabric (WOF). With your remaining fabric, fold it in half one way and then in half again the other way. The rectangle you have now should have a ratio similar to an 8.5x11 piece of paper.

Now onto the sewing part. Start by making the drawstrings out of the four WOF strips you cut earlier. Sew two of these pieces together on the short end, and then repeat with the other two pieces. You should now have two double WOF-length strips. Fold in half length-wise with right sides together, then sew a 1/2 inch seam the length of the strip near the raw edge. Repeat with the other strip. Using a safety pin, clip one piece of the fabric at the end and guide the pin through the fabric tube to turn it right side out. Repeat with the other strip.

I appliquéd my niece's initials and an umbrella onto the front of the bag. If you want to add some appliqué, make sure to do it at this step. Prepare your appliqué as desired. Then unfold your fabric and place the appliqué pieces as desired in the upper right-hand "panel" of your fabric.


Once your appliqué is done, refold your fabric, making sure the appliqué shows on the front, or "right" side. The bottom of the bag should have the main fold of the fabric. Take the front and flip it down and under the main fold, so your "right" sides are together. Sew a 1/2 inch seam down the long sides of the bag. However, leave yourself about 3-3.5 inches at the top for the casing and about an inch at the bottom for inserting the ends of the drawstring.

Now you're ready to make the casing. On the sides of the bag, you will have the 3-3.5 inch section that is unfinished. Turn the fabric in 1/2 inch and sew a "U" down the left side, across the bottom where your previous seam ends, and up the right side of the unfinished edge. Repeat on the other side of the bag. Now you can fold the top of the casing area down so your edge slightly overlaps where the bottom of the U was sewn a minute ago, just slightly more than folding in half. Sew all the way around bag. You can repeat this step if you want to reinforce the casing. Turn the bag right side out.

Now that the casing is done, you can string your drawstring through the casing. With the first piece, use your safety pin again to guide the string through the casing. Start on the right side and string it all the way through until you come back to the other half of the right side. Repeat with the other drawstring, but this time start on the left and return on the other half of the left side.

At this point, you can decide if your drawstrings are too long or just right. If they're too long, trim the excess fabric. If they're just right, then you're ready to enclose the loose ends of the drawstring. Remember the bottom inch or so that you left unsewn when you sewed the sides of the bag together? Insert about 1/2-1 inch of the drawstring into this part of the bag. Fold the the raw edges in and top stitch the drawstring ends inside the bag. I did a zigzag stitch for reinforcement, but you can just backstitch several times if you'd like. Just make sure the drawstring pieces are securely stitched in place.

There you have it: a finished, sturdy drawstring backpack.


Next, I made the pillow, and started by making my own pillow form. I had a strip of fabric that was already the perfect size so I didn't have to cut anything. I turned the fabric right sides together, then sewed 1/4 inch all the way around the raw edges, leaving 3 inches open so I could stuff the fluff into the pillow form. Make sure to turn the pillow form right side out before stuffing it. Once it was fully stuffed, I folded the raw edges of the hole under and then top stitched that section closed.


Next, I took the fabric for the outside of the pillow and sewed the pieces together so that I had one long rectangle piece of fabric. At this point, I stopped and added some more appliqué to tie the pillow and bag together.


Once the appliqué was in place, I put the fabric on the pillow form to see where the pieces overlapped so I knew where to make the envelope enclosure for the back. Then, I took the pillow form out, and finished the raw edges on the short ends of the fabric rectangle. I sewed the sides 1/4 inch and turned the pillow cover right side out. At this point it was time to insert the pillow form for a finished pillow.


I have a baby shower tomorrow so I'll be making a rag quilt tonight. I'm also looking forward to next week as I'll have four nights of sewing time. I hope to make more progress on Jessica's Freebird Picnic quilt.

Hooray if you made it through this incredibly long post. Don't forget to head on over to AmyLouWho's for another Sew & Tell Friday!

LinkWithin

Related Posts with Thumbnails