Saturday, July 23, 2011

Blocks for 4x5 Bee, 3rd Quarter

Thanks to Amy twisting my arm (wink wink), I joined the 3rd quarter of the 4x5 bee on Flickr. I finished up my blocks this morning and I LOVE how they turned out. I seriously want to make a full x and + quilt of my very own.

K*D Quilts asked for purple and orange.

For K*D Quilts, x and + blocks for 4x5 bee, 3rd quarter

Dashasel asked for lilac, garnet, and baby blue.

For Dashasel, x and + blocks for 4x5 bee, 3rd quarter

Around the Quilt Block asked for bubble gum pink, yellow, and cherry red.

For around the quilt block, x and + blocks for 4x5 bee, 3rd quarter

Handmaderetro asked for red and white. This one turned out to be my favorite, which is weird because I'm not a big fan of red.

For handmaderetro, x and + blocks for 4x5 bee, 3rd quarter

Kate @ swim, bike, quilt asked for buttercup, robin's egg, and ash, or yellow, aqua, and gray.

For Kate @ swim, bike, quilt, x and + blocks for 4x5 bee, 3rd quarter

I really enjoyed making this block in different colorways. Bees like this one are a good way to try out a design in various color schemes. I'm excited to see what the girls in my hive end up making for me.

Tuesday, July 19, 2011

WIP Wednesday #36

It's time to check in again on my enormous WIP list. I'm linking up to Lee's WIP Wednesday.

WIP Wednesday at Freshly Pieced

New Projects
Like I mentioned last week, my son has 10 preschool teachers. With the help of my mom and sister, we whipped out (assembly line style) 10 of these gathered clutches using this tutorial from Noodlehead.

Gathered Clutches

Gathered Clutches

Here are a few of them.

Gathered Clutches

Gathered Clutches

Gathered Clutches

Gathered Clutches

My favorite:

Gathered Clutches

Gathered Clutches

Ongoing Projects
I made no progress on any of these, with the exception of the blocks I'm making for this quarter of the 4x5 bee.
  • Daughter's quilt (I picked up the sashing fabric last night - this one will be done soon as the bunkbed we ordered is being delivered this weekend! Incidentally, if anyone is looking for handmade, quality, beautifully constructed, reasonably priced bedroom furniture, check out Arrowhead Wood on Etsy.)
  • Swirling Stars quilt
  • One sister's quilt
  • Blocks for 4x5 Bee, 3rd quarter (I'm planning on finishing these up this week)
  • Kona solids challenge quilt (this one will be done by the third Thursday in August since that's when our quilt guild meets)
  • Sew Beautiful Bee quilt (this one will likely be moved down a few slots on the to-do list as I think I'm going to make two more blocks)
  • Jellyroll sampler quilt (I'm tucking this one away for a while since it's really low on my priority list)
  • Patching Up quilt (I want to finish this one sometime next month too so it's ready for baby's arrival)
  • Orange and blue goldfish quilt (it'd be nice to get to this one before September too, but if I'm realistic, it probably won't be)

I've got seven weeks to go with this pregnancy and since there're so many baby things I need to get done, I doubt I'll be able to knock out much of my WIPs before then. But, I'm still crossing my fingers and hoping that time slows down enough that I can get everything done (but also flies by so I can be done having an achy pregnancy body).

Friday, July 15, 2011

AccuQuilt GO! Baby WINNER

Thanks, everyone, for entering the giveaway last week. I had a good time reading through your name suggestions.

Random.org picked the winner for us this morning.


Congratulations to number 108, Gill, who said:


Gill, look for an email from me.

Thanks again, everyone! Have a great weekend.

Tuesday, July 12, 2011

WIP Wednesday #35

Only two days left to enter to win an AccuQuilt GO! Baby fabric cutter of your very own! Click here to enter the giveaway.

*****

After reading over what I wrote for this post, I think I should call this "Wordy WIP Wednesday." Sheesh! Oh well, at least it goes to show that I've made some progress on my WIP list.

WIP Wednesday at Freshly Pieced

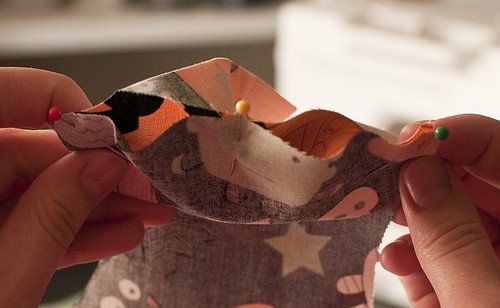
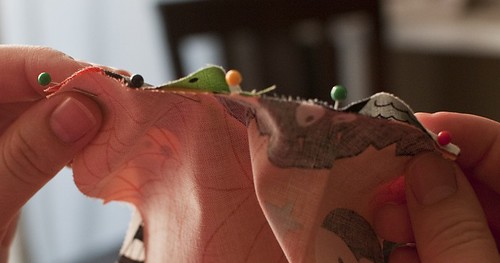
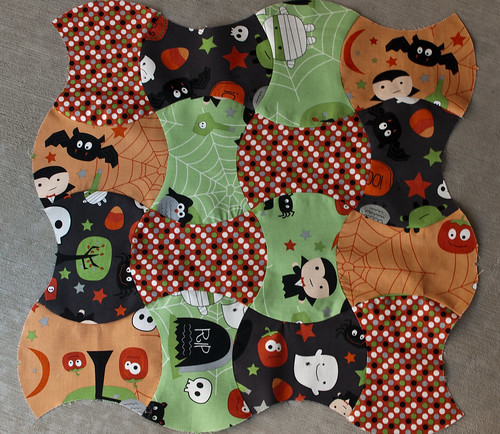
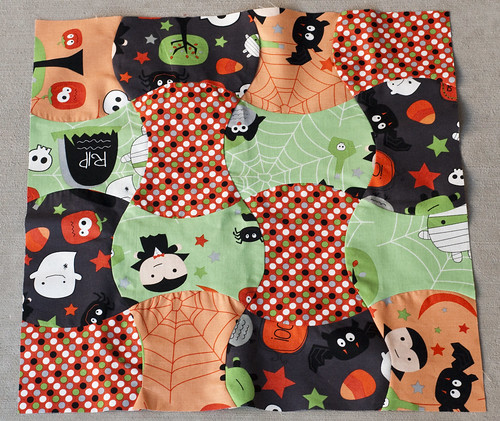
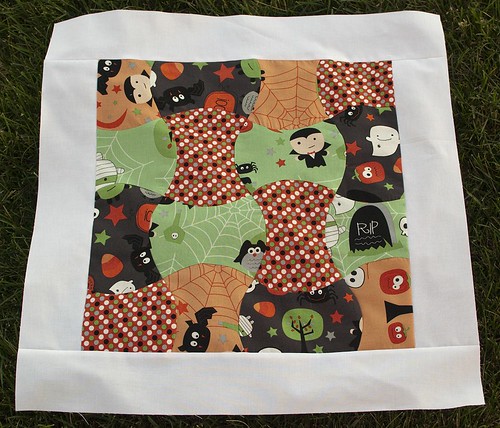
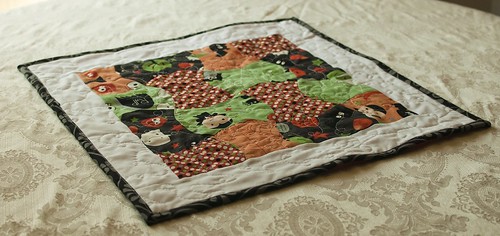
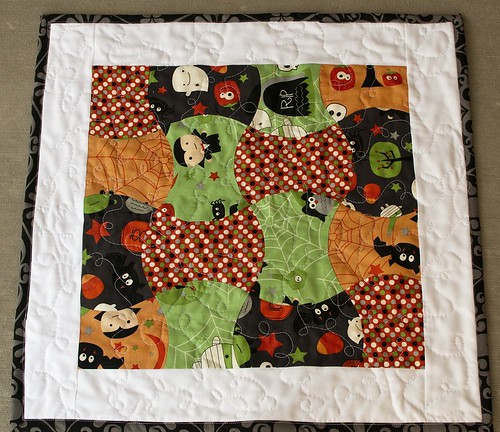
I finished one of the tutorials I had planned on doing using my new AccuQuilt GO! Baby.

Halloween Wall-Hanging/Table Topper

I also made some headway on the quilt for my daughter's bed. I changed my mind on the color sashing I wanted to use so now I just need to get the fabric ordered. Say goodbye to off-white and hello to light gray. (This quilt deserves a post of its own so stay tuned for that.)

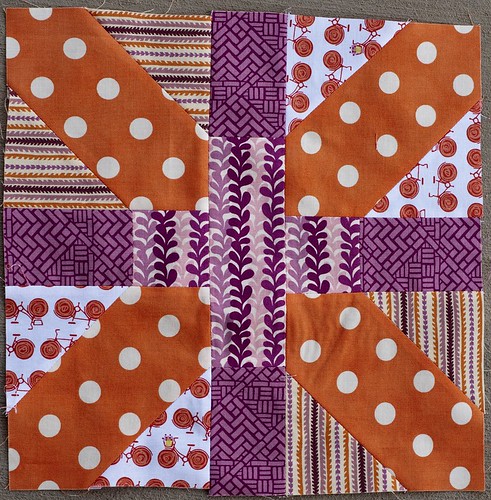
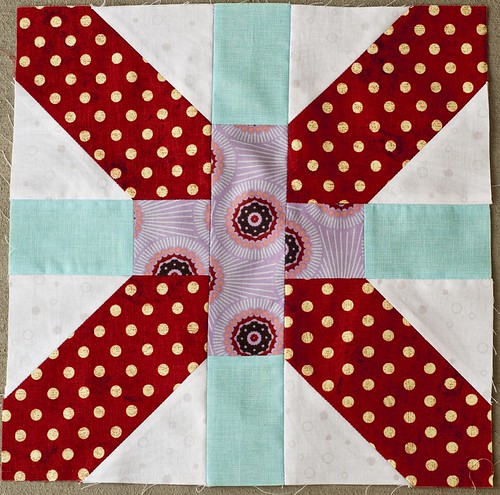
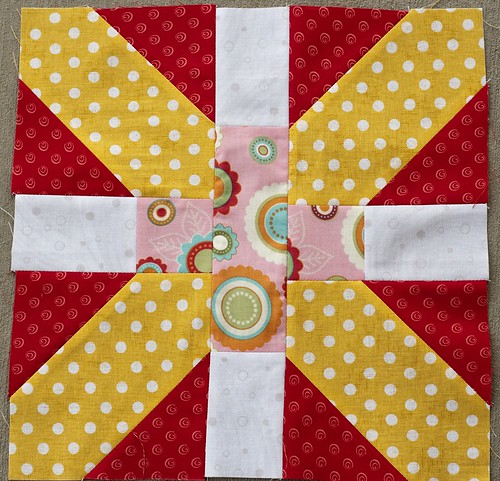
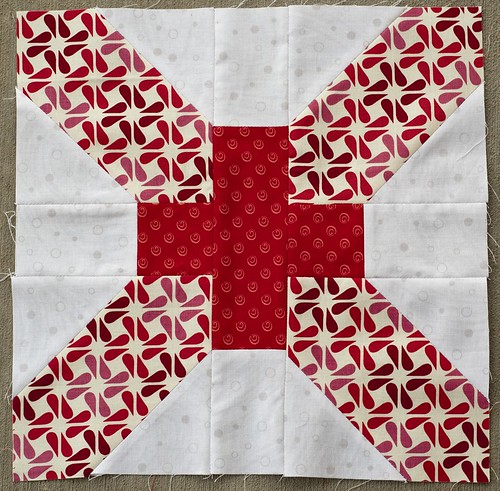
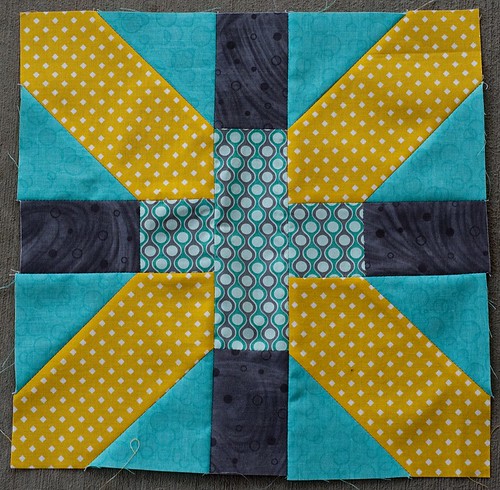
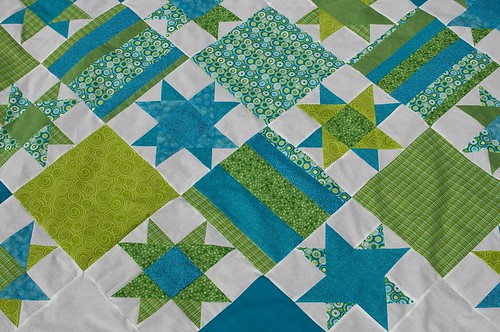
I really wanted to feel like I was accomplishing something this weekend (rather than sewing things here and there and not feeling like I was getting anything done). So, I pulled out the star blocks I started making WAY back in 2007. AND...

I PIECED THE TOP!

Swirling Stars Quilt Top

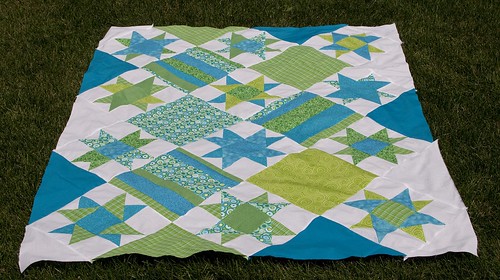
I bought these turquoise and bright green fabrics from a local Hancocks back when I didn't have a clue about fabric, so the quality isn't the greatest. This was also my first attempt at placing blocks on-point in a quilt. I didn't use any fabric other than what I bought four years ago, with the exception of the solid blue, which is a Kona that I bought a few months ago just to have.

Swirling Stars Quilt Top

I was able to keep the momentum going and got another quilt top pieced last weekend, but I can't show you that for another week or so (it's a surprise for someone special).
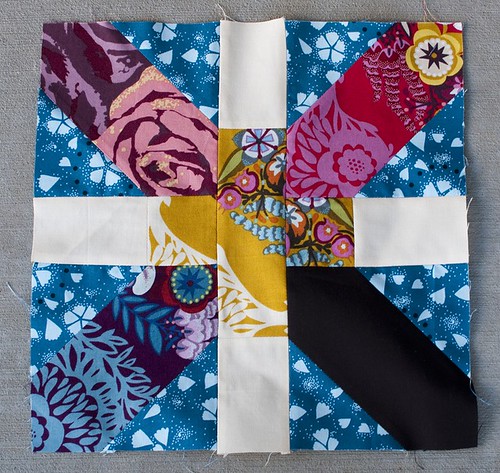
I managed to sew Megan's bee block and I also cut out the pieces for the blocks I'll be sending to the ladies in my hive in the 4x5 bee. Hopefully, I'll get those sewn up in the next day or two.

x and + block for Megan

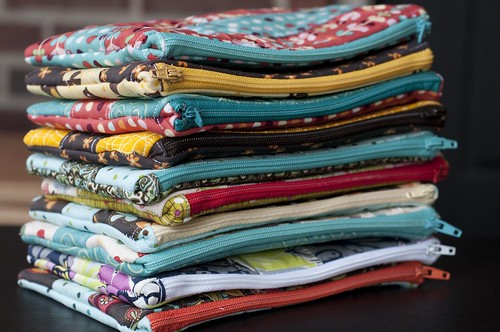
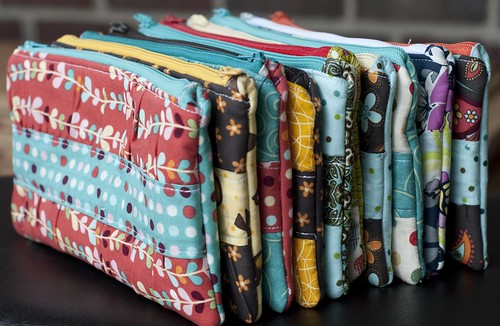
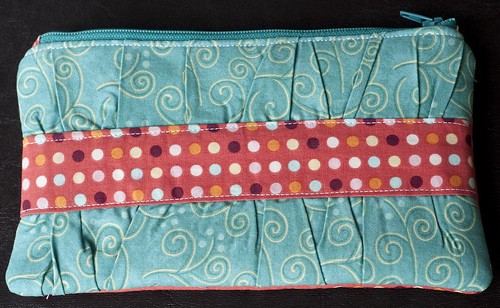
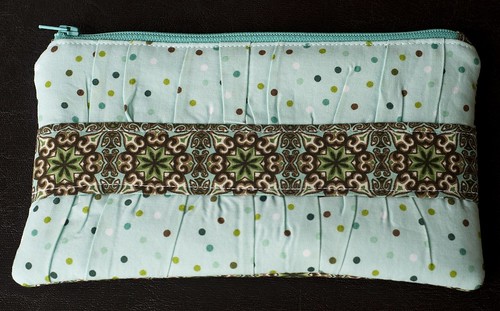
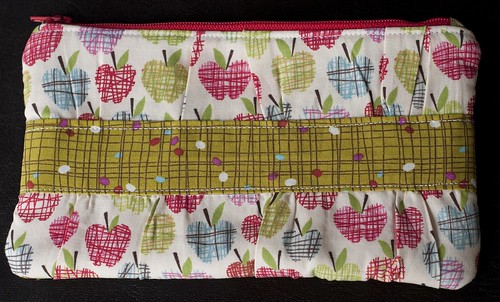
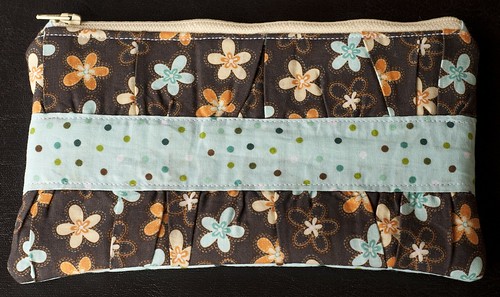
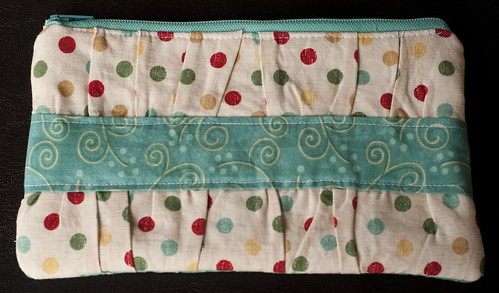
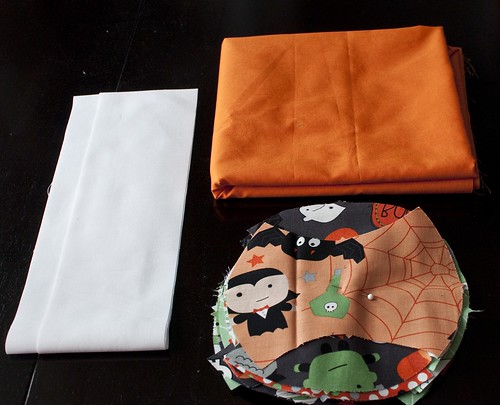
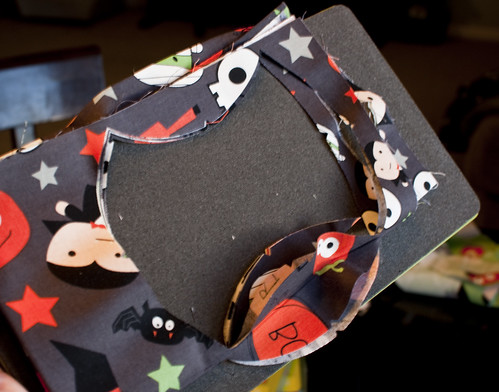
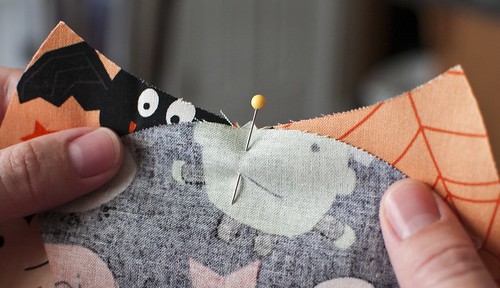
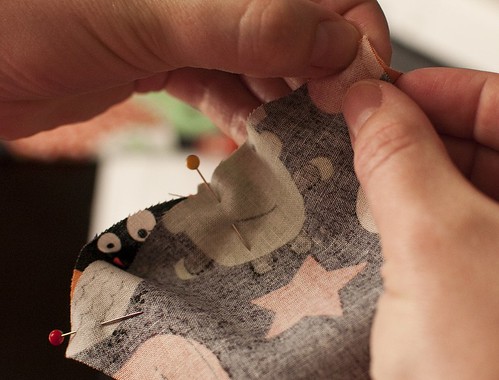
I also started another project: 10 gathered clutches for my son's AMAZING teachers (yes, he has 10 of them). Next week is his last week of school and I'm sad that he'll be moving on to a different program next month.

I haven't made any progress since my last update on any of these projects:
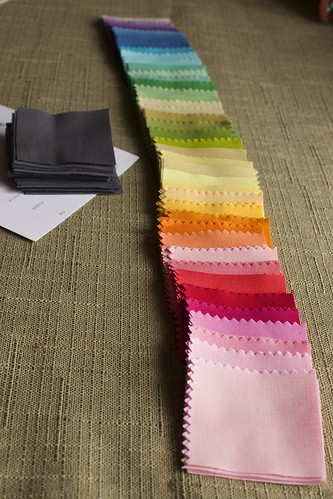
  • Kona Solids Challenge quilt

    Kona Solids Challenge

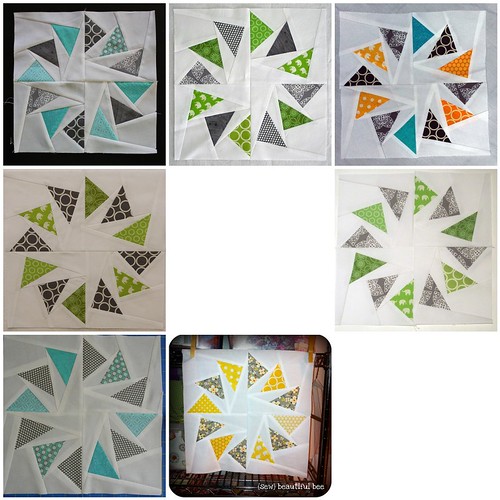
  • Sew Beautiful Bee circle of geese quilt

    Blocks Received from Sew Beautiful Bee Ladies

  • Jellyroll Sampler quilt

    Jelly Roll Quilt Along Quilt Top

  • Patching Up quilt

    patching up quilt top

  • Orange and Blue Goldfish quilt

    Goldfish Squares Quilt

In piecing those two tops this past weekend, my total for quilt tops awaiting basting, quilting, and binding is up to six. Yikes! I seriously don't like the basting process, so I may have to give spray basting a go. Have any of you tried it and swear by it? I'd love to hear of any tips or tricks you may have.

Okay, folks. That's all. Now head on over to Lee's and check out everyone else's WIPs.

Saturday, July 9, 2011

x and + Block for Megan

If you're looking for the AccuQuilt GO! Baby giveaway, click here. You have until July 14th to enter to win.

*****

Man, was I on the ball this month! I received Megan's fabric last week and got the block sewn up within a couple of days. Woot woot!

In our Sew Beautiful Bee, Megan asked for x and + blocks using this tutorial from Badskirt. This was such a fun block to make and I am seriously tempted to make an entire quilt out of these babies. The tutorial was really easy to follow and the block sewed up super fast.

x and + block for Megan

I think this would be a great design to use up some of my scraps. But, I promised myself I wouldn't start any new projects until I tackle some of the old works in progress.

Friday, July 8, 2011

Giveaway: AccuQuilt GO! Baby Fabric Cutter

*** GIVEAWAY CLOSED ***

Thanks to AccuQuilt, one of you lucky readers has the chance to win a GO! Baby fabric cutter and three dies of your choice!


Details:

There are three ways to enter. You will receive one entry per item. Complete all three and you’ve tripled your chances.
  1. Become a follower and leave a comment letting me know you’re a new follower. If you’re already a follower, leave a comment letting me know that too.
  2. Leave a comment with the three dies you would choose if you win (and if you have any projects in mind). And for fun, since the mister and I don’t know what our baby’s gender is, include a name suggestion if you’ve got one (boy or girl or both).
  3. Blog and/or facebook about this giveaway and leave a comment with the link.
This giveaway is open domestically and internationally. Please, please, please provide a way for me to contact you. If I can’t get in touch, I’ll have to choose another winner. The giveaway will be open until next Thursday, July 14th, at 10pm MDT (since I need to leave myself time to get in line to see the Harry Potter premiere).

As an added bonus, AccuQuilt is offering 22 free patterns. Click the image below to sign up for AccuQuilt's newsletter.


Good luck, everyone!

Disclaimer: This is a sponsored giveaway from AccuQuilt.

Saturday, July 2, 2011

AccuQuilt GO! Baby Tutorial: Halloween Table Topper

Hi, everyone. I hope for you Americans that your July 4th weekend is off to a good start, and that the rest of you are having a great weekend! My kids rode in a parade this morning, and then Monday will be full of another parade, a helicopter candy drop (my son's favorite), a BBQ, bounce houses and slides, and fireworks.

**********

As you can guess, I'm part of AccuQuilt's Blogger Program. I was graciously sent a new Accuquilt GO! Baby Fabric Cutter and three dies of my choice to try out. One of the dies I chose is the apple core.

My new GO! baby

I thought it would be a fun design to use on a little Halloween wall-hanging/table topper. If you're anything like me, you have good intentions of making stuff for the holidays, but then time gets away from you and you're rushing to finish. Since I won't have any sewing time for Halloween (or Christmas for that matter) with a new baby, I thought I better get a jump start on some of my plans.

Halloween Wall-Hanging/Table Topper

So, here we go. To make the wall-hanging (that doubles as a table topper) above, you will need:
  • 4 fat quarters of fabric of your choosing (you won't use the entire fat quarter, but 4 gives you a good variety of prints)
  • 2 strips of border fabric, cut at 2.75/3 inches (width of fabric)
  • PINS!
  • batting
  • backing fabric
  • binding fabric
  • AccuQuilt GO! Baby Fabric Cutter
  • apple core die

Halloween Wall-Hanging/Table Topper

Fold your fat quarter(s) to cover the die, getting close to all edges to eliminate waste. (I was able to cut through six layers of fabric without a problem. You only need to have four apple core pieces from each fat quarter.) Place the die foam side up, the fabric on top of the die, and the cutting mat on top of the fabric.

Enlist the help of little ones to see how easy it is to cut through the fabric.

Halloween Wall-Hanging/Table Topper

On, my first cut through I didn't put the fabric as close to the edges of the apple core as I could have so I had a little more waste than I had planned. But it was still minimal and probably the same amount I'd get if I were cutting this shape out by hand. I've heard some people trace the die image with a Sharpie to help them see it better. I probably should have done that as I can see how it could help; although I didn't have a hard time seeing the outline of the shape at all.

Halloween Wall-Hanging/Table Topper

Repeat the cutting process three more times so you end up with 16 apple cores.

Now it's time to pin! If you've sewn curves before, you may not need pins, but I still found them helpful. The apple core die has notches to help you see where to align the convex and concave parts of the apple core shape.

Halloween Wall-Hanging/Table Topper

Insert a pin where those notches meet.

Halloween Wall-Hanging/Table Topper

Next, line up one corner and pin.

Halloween Wall-Hanging/Table Topper

Repeat with the other corner.

Halloween Wall-Hanging/Table Topper

Your fabric will be gathered; it won't lie flat.

Halloween Wall-Hanging/Table Topper

Now, just to be safe and ensure that your pieces don't shift as you sew them together, add pins between the left side and middle, and the middle and right side. (Tip: When sewing curves, it's always better to use more pins than you think you'll need.)

Halloween Wall-Hanging/Table Topper

You're ready to sew! Piece your apple cores into rows. Then press them. I should have taken a picture of this part, but I didn't. For this shape, it's easiest if you press the convex parts of the apple core out and the concave parts in. Once your rows are pieced, sew them together to get a 4x4 layout.

Halloween Wall-Hanging/Table Topper

Next, square up your block.

Halloween Wall-Hanging/Table Topper

Add the border fabric to the top and bottom of the block, and then to the left and right sides. (Oops, I took a picture of the block sideways so my border is shown as being sewn to the sides first and then the top and bottom.)

Halloween Wall-Hanging/Table Topper

Baste, quilt, and bind.

Halloween Wall-Hanging/Table Topper

And put it on your table, or hang it on your wall.

Halloween Wall-Hanging/Table Topper

I have to admit that when Carolyn contacted me to see if I would like to participate in AccuQuilt's Blogger Program, I was so excited! When the box arrived on my doorstep, I couldn't wait to check it out. Cutting is my least favorite part of quilting (and basting isn't much fun either), so any ways of easing that step is something worth looking into. I am looking forward to trying out the other dies I received, and I already have a list of other dies I'd like to buy!

If you're interested in some free patterns, click the image below to sign up for AccuQuilt's newsletter.


Stay tuned for a chance to win your own AccuQuilt GO! Baby and three dies. Have a great weekend everyone!

LinkWithin

Related Posts with Thumbnails