

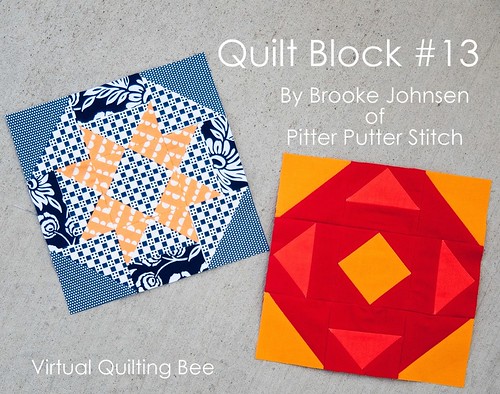
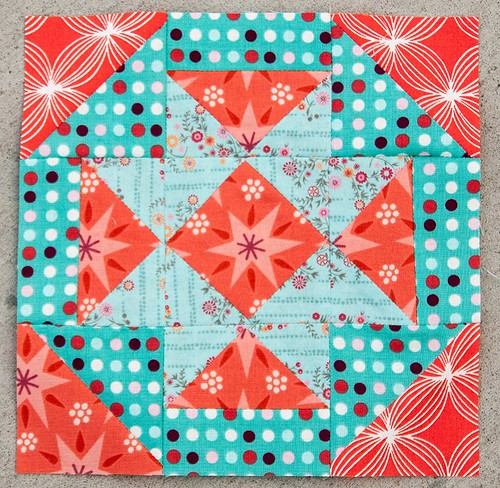
This block is comprised of four half square triangles (HSTs), four flying geese units, four rectangles, and one square-in-square block. Depending on the focus you want the block to take, you can make several variations of this block: two color, scrappy, monochromatic, low contrast, and more. At the end of this tutorial, I'll show you how this block can look different just by changing your fabric placement.
Cutting Directions
Note: When I refer to "print A" or "print B," I just mean that the unit itself should have two separate fabrics, not that prints A and B are consistently the same fabric throughout the tutorial.
HSTs
From two fabrics, cut the following:
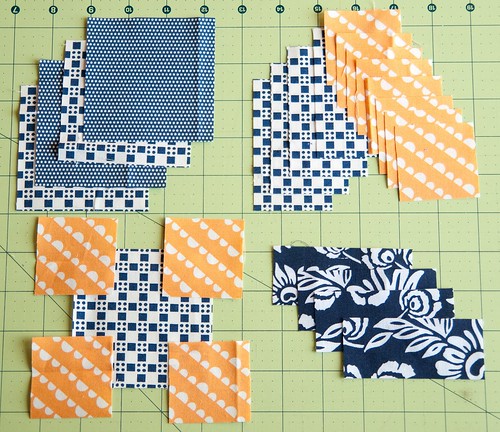
(2) 3 3/8" squares of print A
(2) 3 3/8" squares of print B (top left in the photo below)
Flying Geese
From two fabrics, cut the following:
(4) 3 1/2" x 2"strips of print A
(8) 2" squares of print B (top right in the photo below)
Rectangles
From one fabric, cut the following:
(4) 3 1/2" x 1 1/2" strips (bottom right in the photo below)
Square-in-Square
From two fabrics, cut the following:
(1) 3 1/2" square of print A
(4) 2" squares of print B (bottom left in the photo below)
Pre-Assembly Directions
Grab a pencil or fabric marking pen and the following pieces of fabric you just cut:
(12) 2" squares
(2) 3 3/8" squares (make sure the two prints are the same)
Mark a line on each piece of fabric on the diagonal.
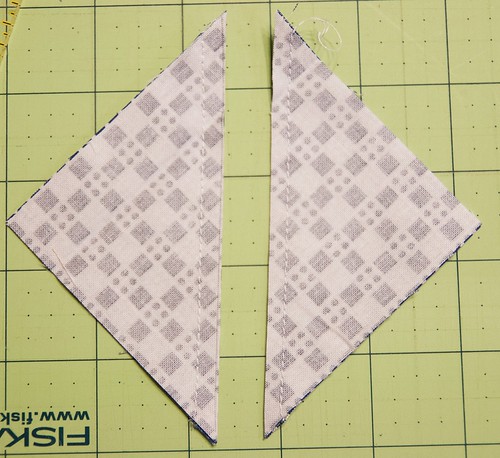
HSTs
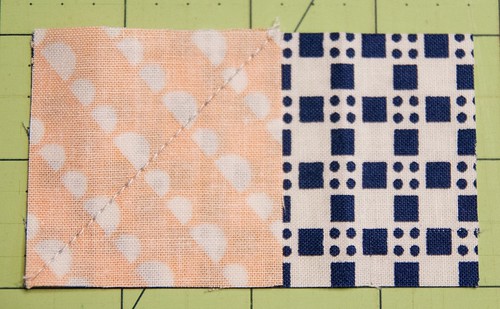
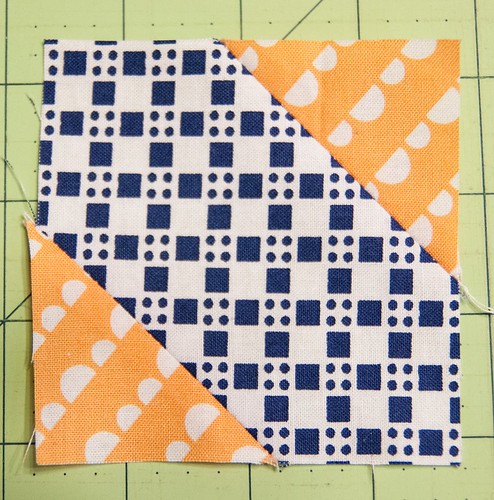
Take the (2) 3 3/8" squares that you marked and place them right sides facing on the (2) 3 3/8" unmarked squares. (Refer to the image on the right in the photo below.)
Flying Geese
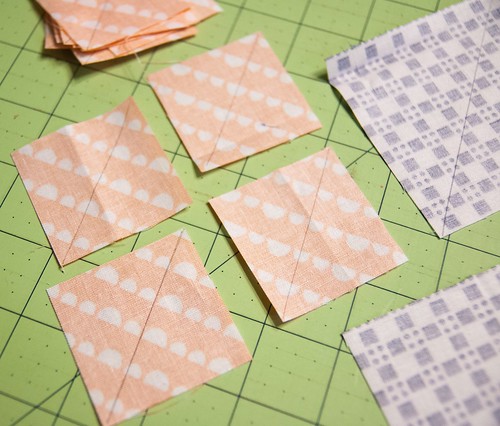
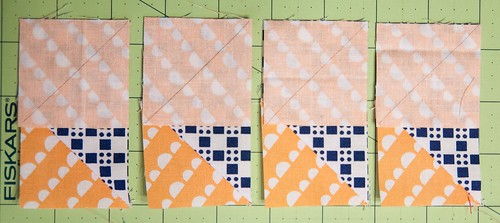
Take (1) 2" square and (1) 3 1/2" x 2" strip. Place the square on top of the strip as shown in the top left image below, ensuring that the line you drew extends from the bottom left corner to the top middle of the strip.
Repeat with (3) more squares and (3) more strips.
Square-in-Square
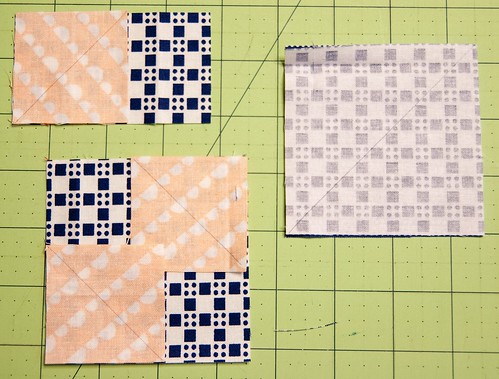
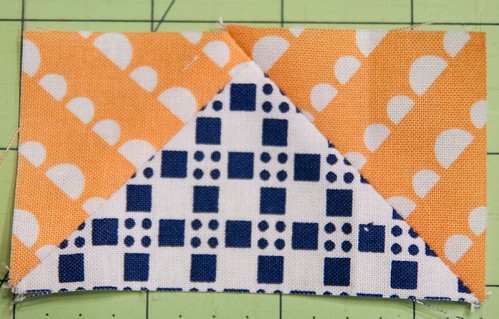
Take (2) 2" squares and (1) 3 1/2" square. Place the 2" squares on opposite corners of the larger square, right sides facing, ensuring that the diagonal lines you drew on each square do not extend into the corners. (Refer to the image in the bottom left of the photo below.)
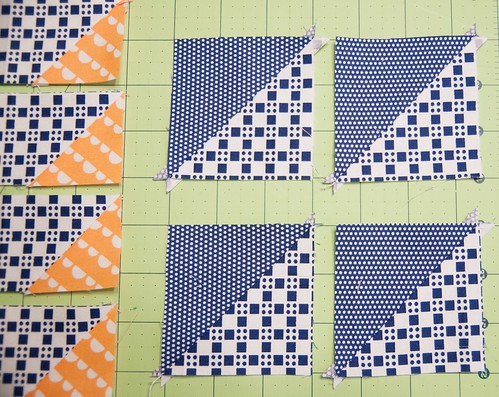
Sub-Block Piecing Directions
For each flying geese unit and the square-in-square block, you need to stitch directly on the diagonal line you drew on the 2" squares. Refer to the next two photos.
For the HSTs, sew 1/4" on each side of the drawn line rather than on the line itself.
Piecing this blocks goes quickly if you chain piece assembly-line style.
Once you've sewn along your lines, next comes the cutting part.
HSTs
Cut along the line you drew.
Flying Geese
Cut 1/4" away from the stitched line.
Square-in-Square
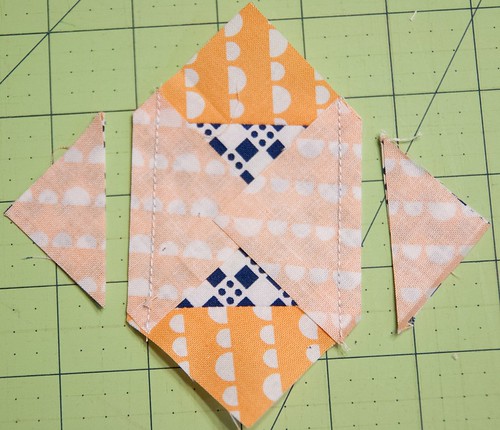
Cut 1/4" away from each stitched line, toward the outside corners.
Pressing Directions
Once you've stitched and cut each unit up to this point, press your units open to minimize bulk.
Remaining Pre-Assembly Directions
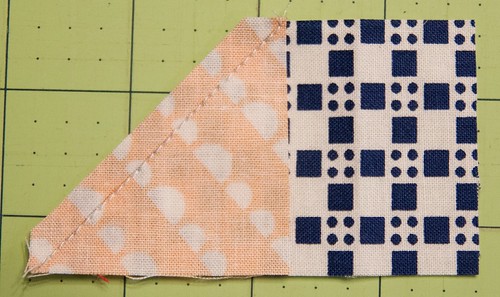
Flying Geese
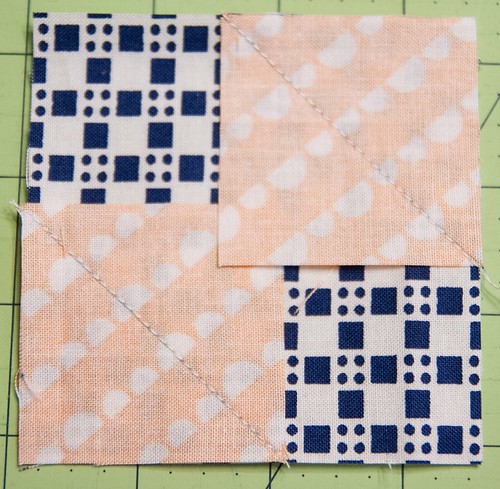
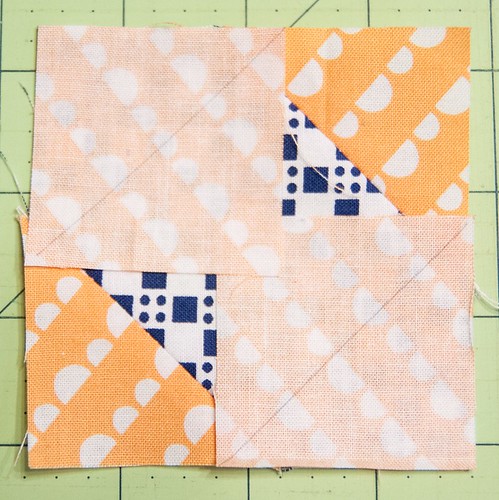
With the remaining (4) 2" squares, repeat the steps noted above for the flying geese units. Refer to the photo below to place the squares with the diagonal lines running in the right direction on each strip. Make sure to place the fabrics right sides together.
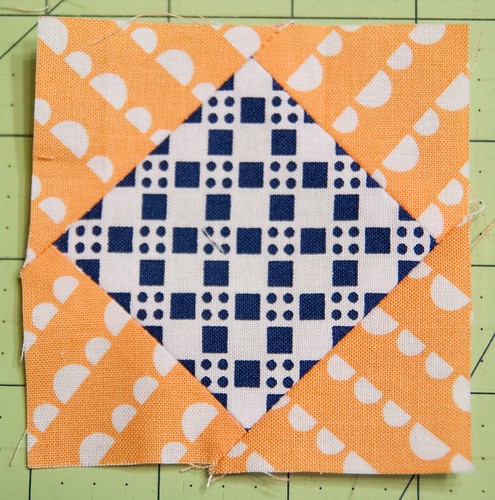
Square-in-Square
Take the (2) remaining 2" squares for the square-in-square block and place them on the opposite corners from where you placed the previous squares. Refer to the photo below for correct placement of the diagonal lines.
Remaining Sub-Block Piecing Directions
Stitch along the diagonal lines for both the square-in-square block and the remaining flying geese units. Trim 1/4" from the sewn lines.

Remaining Pressing Directions
Press these remaining seams open to reduce bulk.
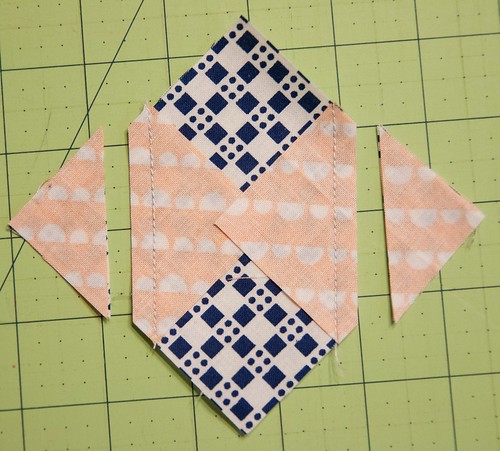
Block Assembly Directions
Now that all your sub-units are pieces, lay the blocks out like so.

Piece the 3 1/2" x 1 1/2" strips to each flying geese unit.
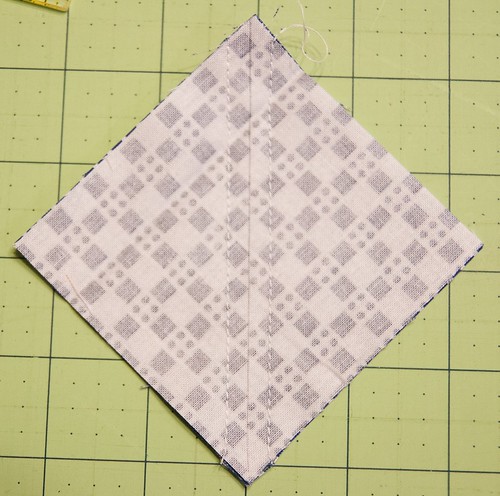
Then piece each sub-unit into rows and then piece the rows together. You'll end up with a block like this, which measures 8 1/2" unfinished.
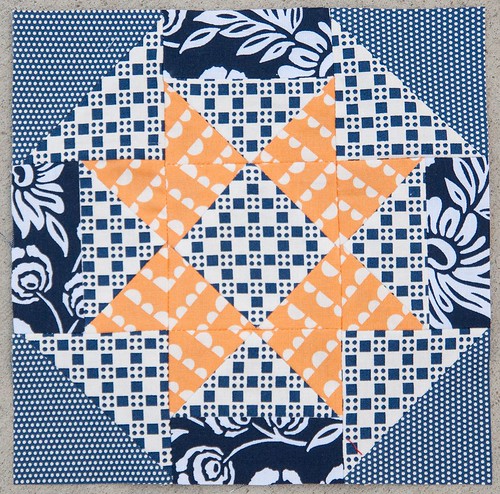
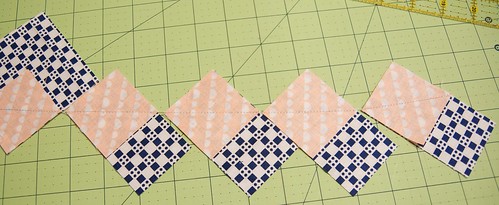
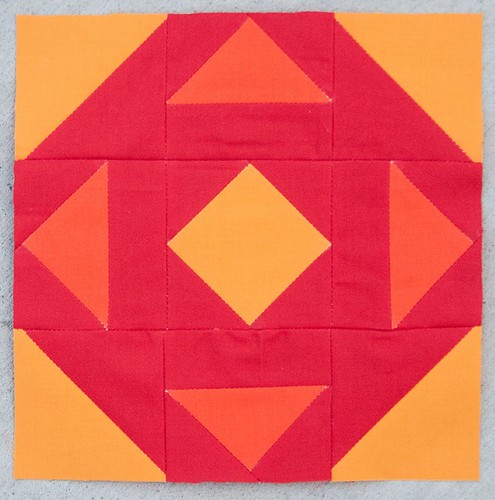
Now that you've completed your block, here are a few others that show how different the block can look based on the fabrics as well as the layout.
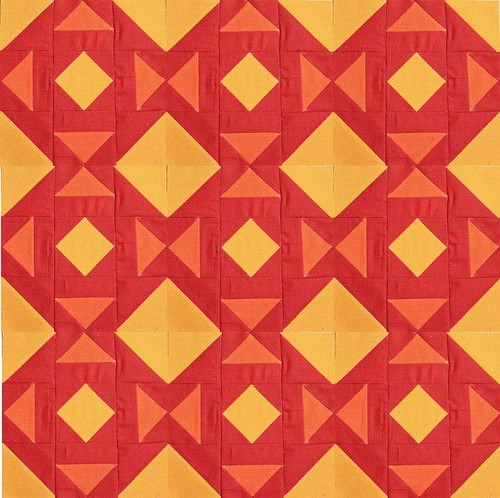
For this solid fabric block, I reversed the direction of the flying geese units.
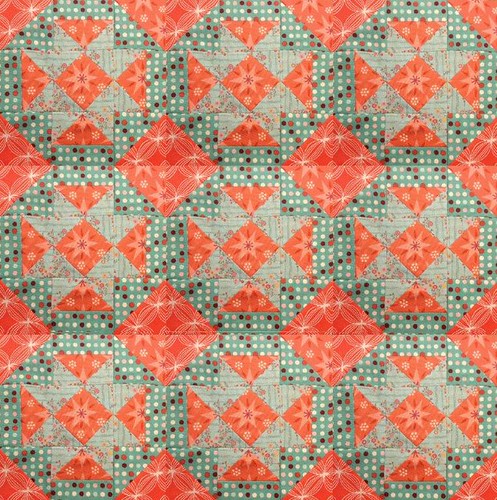
And here's my initial test block. The fabrics in this block have the same level of contrast, creating a softer, more low volume look.
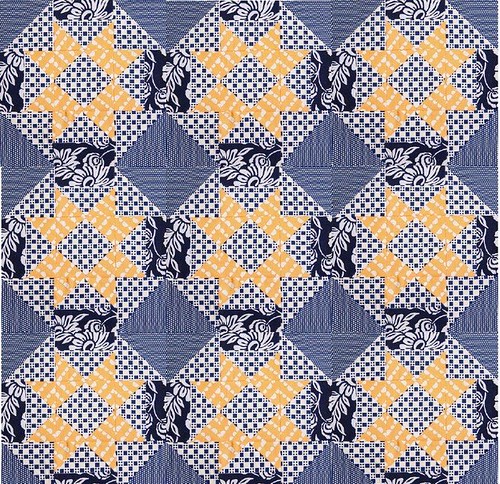
Now, if you make more blocks in each varied style, you could have a quilt that looks like this:
or this:
or this:
I have to say that while I like the individual block I made out of the Happy Go Lucky fabrics, I like how dramatic the Kona block layout is.
If you've missed any of the previous block tutorials, you can catch up on them here. Also, make sure to add your blocks to the Flickr group so we can all see!
Please let me know if you run into any problems while making this block. I'm happy to answer any questions or help out in any way that I can.
5 comments:
This is fabulous! I can't wait to try it!!
Love the block! Great fabric choices!
love both versions!!! I'm making both!!
I love the alternate layout, it's so striking! Nice design, Brooke.
Looking forward to making this one. Love the choices here:)
Post a Comment