Thursday, August 29, 2013

An update on my WIP tracker

It's been a while since I posted an update on how my WIP tracking is going, so I thought I'd share a little about it today since we’re two-thirds of the way through the year.


In January, I tried to have this list only contain my previous in-progress quilt items, but as the year went on, I found myself adding each project that I was working on to the list. It’s been a good method of helping me identify where I’m at with each individual project.

My goal at the outset of the year was to complete all my WIPs before starting anything new. It’s important to be flexible, right? So there are items on my list that are still in various stages of completion and I’m sure I won’t finish everything that was started prior to 2013. And that’s okay. I’ve been able to cross a lot of quilts off my list (17 so far this year), which is great. I’m hoping to get a few more quilts finished this year, but since I’m trying to get into graduate school and having surgery in the next month, I’m sure at least four of these quilts will be carrying over to next year.

Here are two of the quilts I hope to finish up soon:

A Labyrinth quilt using the pattern by Rita of Red Pepper Quilts:

A photo by pitterputterstitch on Instagram


and a blue plus quilt featuring a variety of novelty prints for a fun, [hopefully] manly quilt.
A photo by pitterputterstitch on Instagram


I'll be back to share two new quilt finishes, hopefully next week if I get my computer back from the shop.

Friday, August 23, 2013

Virtual Quilting Bee: Starflake Block Tutorial

Hi there! My name is Brooke and this is my little piece of the blogosphere. If you're here from Amy's blog, Diary of Quilter, welcome! Take a few minutes to look around. I hope you'll like what you see.


I was excited when Amy asked me to participate in her virtual quilting bee (more details here). Amy is one of the most wonderful people, so if you ever get the chance to meet her, you're one lucky person!
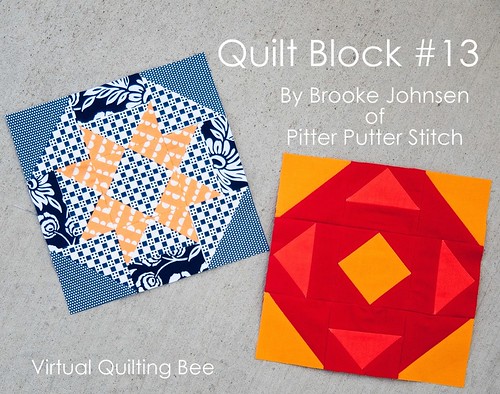
Virtual Quilting Bee Block Tutorial

This block is comprised of four half square triangles (HSTs), four flying geese units, four rectangles, and one square-in-square block. Depending on the focus you want the block to take, you can make several variations of this block: two color, scrappy, monochromatic, low contrast, and more. At the end of this tutorial, I'll show you how this block can look different just by changing your fabric placement.

Cutting Directions

Note: When I refer to "print A" or "print B," I just mean that the unit itself should have two separate fabrics, not that prints A and B are consistently the same fabric throughout the tutorial.

HSTs
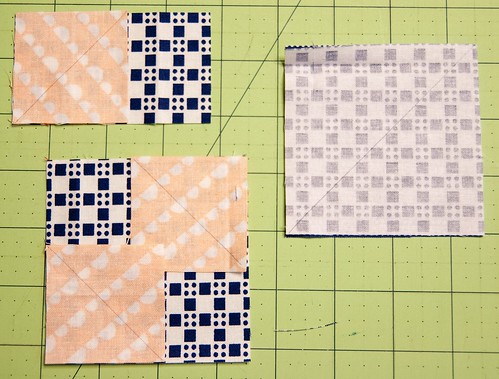
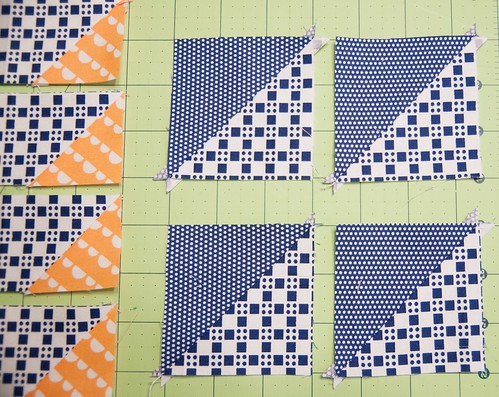
From two fabrics, cut the following:
(2) 3 3/8" squares of print A
(2) 3 3/8" squares of print B (top left in the photo below)

Flying Geese
From two fabrics, cut the following:
(4) 3 1/2" x 2"strips of print A
(8) 2" squares of print B (top right in the photo below)

Rectangles
From one fabric, cut the following:
(4) 3 1/2" x 1 1/2" strips (bottom right in the photo below)

Square-in-Square
From two fabrics, cut the following:
(1) 3 1/2" square of print A
(4) 2" squares of print B (bottom left in the photo below)
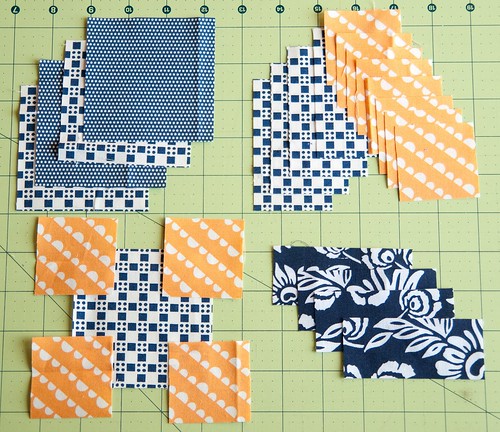
Virtual Quilting Bee Block Tutorial

Pre-Assembly Directions

Grab a pencil or fabric marking pen and the following pieces of fabric you just cut:
(12) 2" squares
(2) 3 3/8" squares (make sure the two prints are the same)

Mark a line on each piece of fabric on the diagonal.
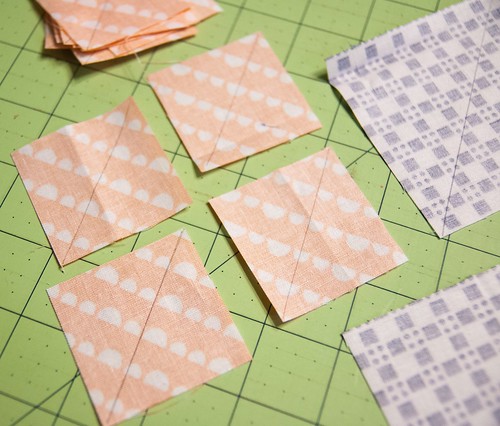
Virtual Quilting Bee Block Tutorial

HSTs
Take the (2) 3 3/8" squares that you marked and place them right sides facing on the (2) 3 3/8" unmarked squares. (Refer to the image on the right in the photo below.)

Flying Geese
Take (1) 2" square and (1) 3 1/2" x 2" strip. Place the square on top of the strip as shown in the top left image below, ensuring that the line you drew extends from the bottom left corner to the top middle of the strip.

Repeat with (3) more squares and (3) more strips.

Square-in-Square
Take (2) 2" squares and (1) 3 1/2" square. Place the 2" squares on opposite corners of the larger square, right sides facing, ensuring that the diagonal lines you drew on each square do not extend into the corners. (Refer to the image in the bottom left of the photo below.)

Virtual Quilting Bee Block Tutorial

Sub-Block Piecing Directions

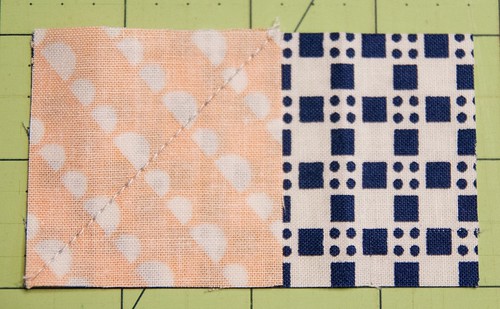
For each flying geese unit and the square-in-square block, you need to stitch directly on the diagonal line you drew on the 2" squares. Refer to the next two photos.
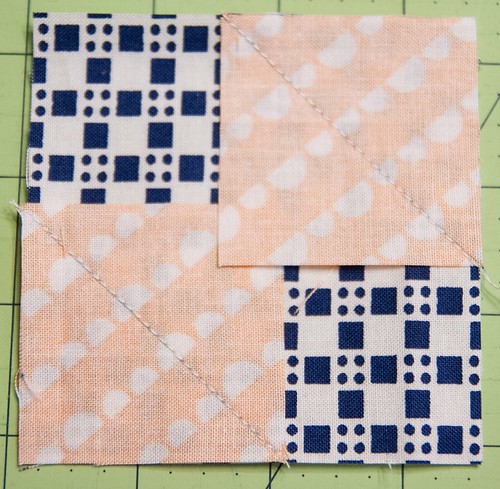
Virtual Quilting Bee Block Tutorial

Virtual Quilting Bee Block Tutorial

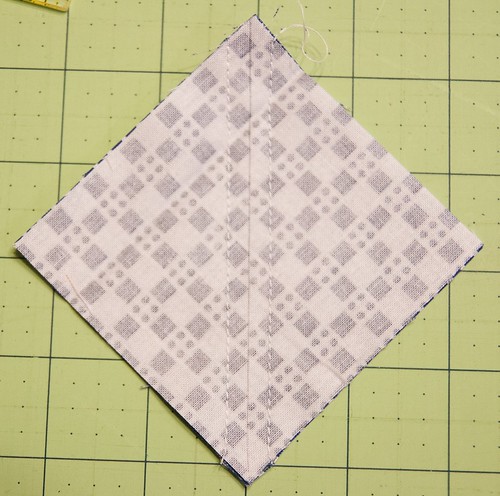
For the HSTs, sew 1/4" on each side of the drawn line rather than on the line itself.
Virtual Quilting Bee Block Tutorial

Piecing this blocks goes quickly if you chain piece assembly-line style.

Virtual Quilting Bee Block Tutorial

Once you've sewn along your lines, next comes the cutting part.

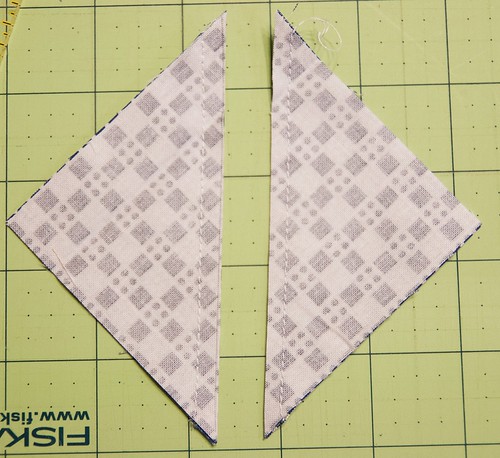
HSTs
Cut along the line you drew.
Virtual Quilting Bee Block Tutorial

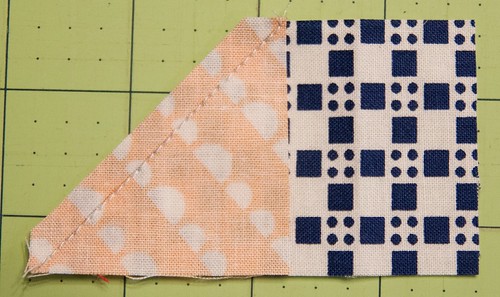
Flying Geese
Cut 1/4" away from the stitched line.
Virtual Quilting Bee Block Tutorial

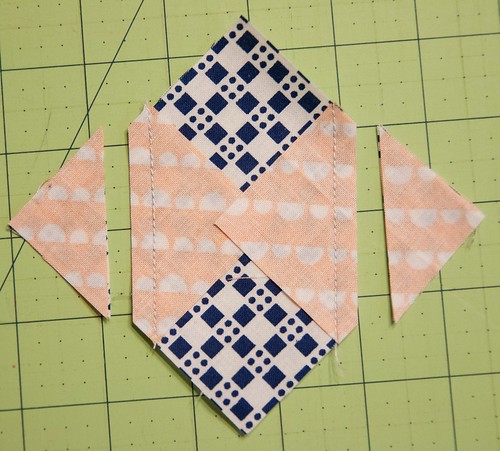
Square-in-Square
Cut 1/4" away from each stitched line, toward the outside corners.
Virtual Quilting Bee Block Tutorial

Pressing Directions

Once you've stitched and cut each unit up to this point, press your units open to minimize bulk.
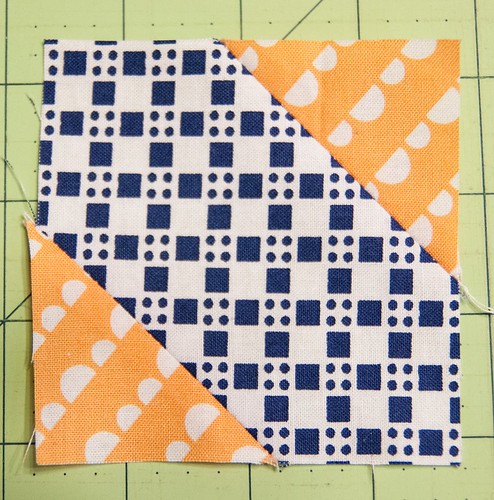
Virtual Quilting Bee Block Tutorial

Virtual Quilting Bee Block Tutorial

Remaining Pre-Assembly Directions

Flying Geese
With the remaining (4) 2" squares, repeat the steps noted above for the flying geese units. Refer to the photo below to place the squares with the diagonal lines running in the right direction on each strip. Make sure to place the fabrics right sides together.
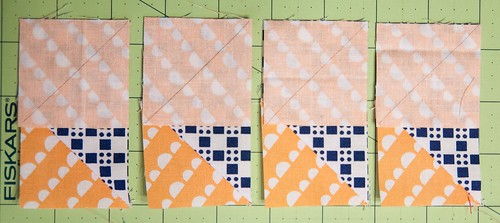
Virtual Quilting Bee Block Tutorial

Square-in-Square
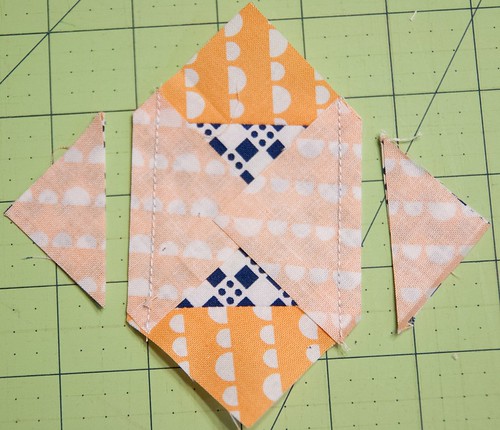
Take the (2) remaining 2" squares for the square-in-square block and place them on the opposite corners from where you placed the previous squares. Refer to the photo below for correct placement of the diagonal lines.
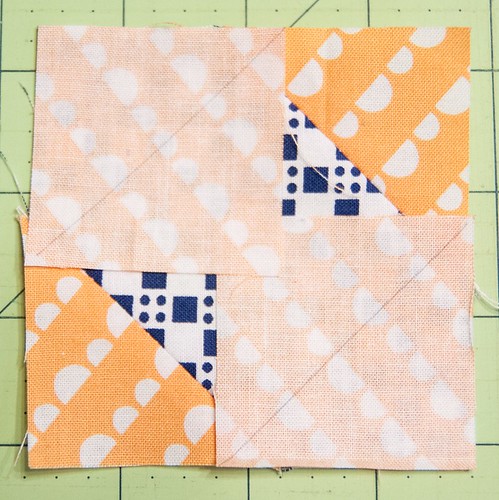
Virtual Quilting Bee Block Tutorial

Remaining Sub-Block Piecing Directions

Stitch along the diagonal lines for both the square-in-square block and the remaining flying geese units. Trim 1/4" from the sewn lines.
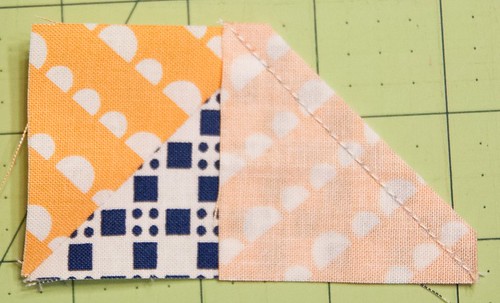
Virtual Quilting Bee Block Tutorial

Virtual Quilting Bee Block Tutorial

Remaining Pressing Directions

Press these remaining seams open to reduce bulk.
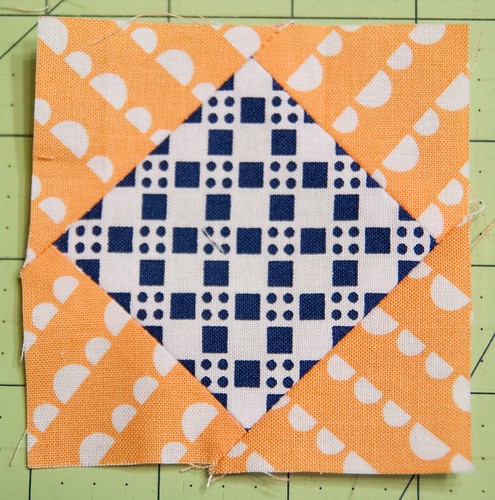
Virtual Quilting Bee Block Tutorial

Virtual Quilting Bee Block Tutorial

Block Assembly Directions

Now that all your sub-units are pieces, lay the blocks out like so.
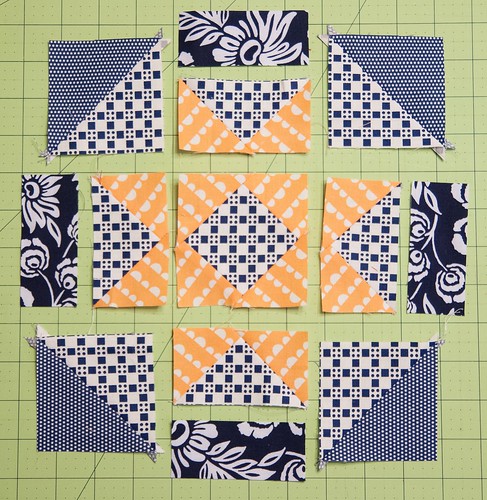
Virtual Quilting Bee Block Tutorial

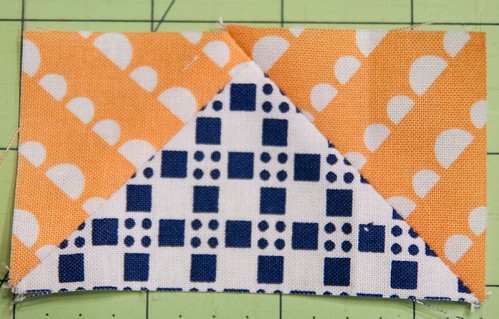
Piece the 3 1/2" x 1 1/2" strips to each flying geese unit.

Then piece each sub-unit into rows and then piece the rows together. You'll end up with a block like this, which measures 8 1/2" unfinished.
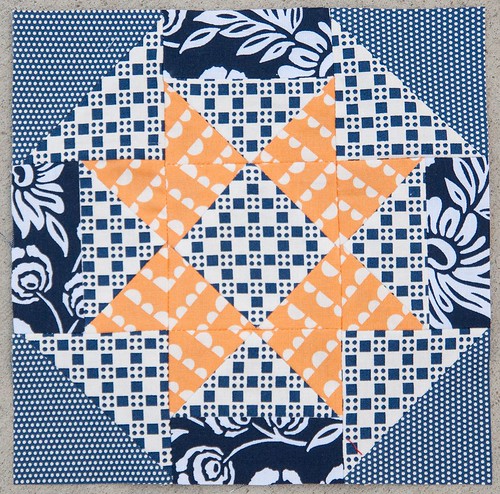
Virtual Quilting Bee Block Tutorial

Now that you've completed your block, here are a few others that show how different the block can look based on the fabrics as well as the layout.

For this solid fabric block, I reversed the direction of the flying geese units.
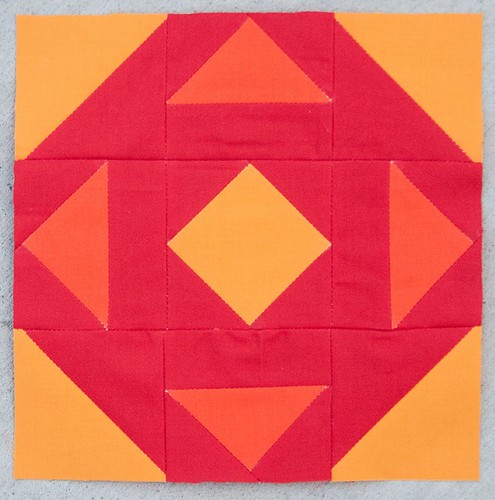
Virtual Quilting Bee Block Tutorial

And here's my initial test block. The fabrics in this block have the same level of contrast, creating a softer, more low volume look.
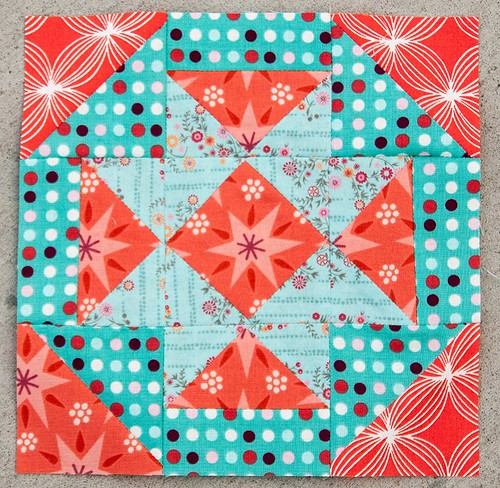
Virtual Quilting Bee Block Tutorial

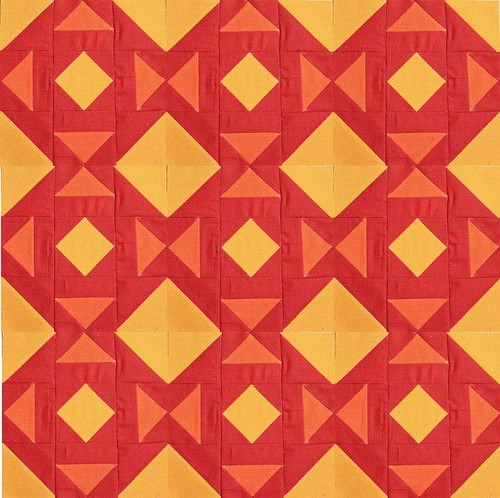
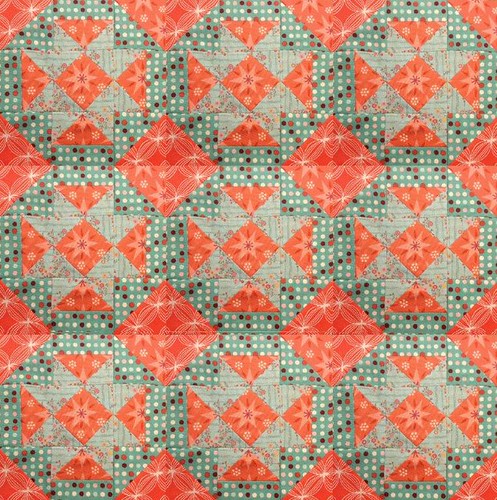
Now, if you make more blocks in each varied style, you could have a quilt that looks like this:
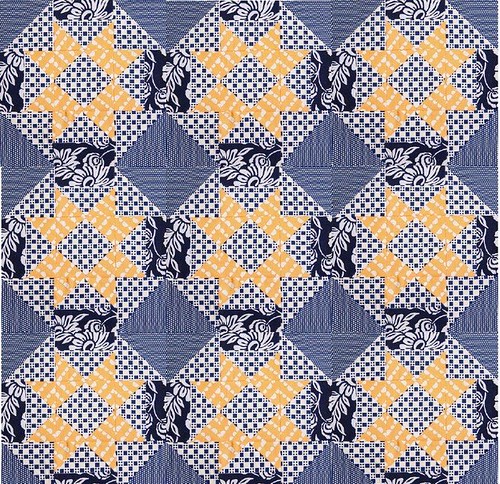
Virtual Quilting Bee Block Tutorial

or this:

Virtual Quilting Bee Block Tutorial

or this:

Virtual Quilting Bee Block Tutorial

I have to say that while I like the individual block I made out of the Happy Go Lucky fabrics, I like how dramatic the Kona block layout is.

If you've missed any of the previous block tutorials, you can catch up on them here. Also, make sure to add your blocks to the Flickr group so we can all see!

Please let me know if you run into any problems while making this block. I'm happy to answer any questions or help out in any way that I can.

Wednesday, August 14, 2013

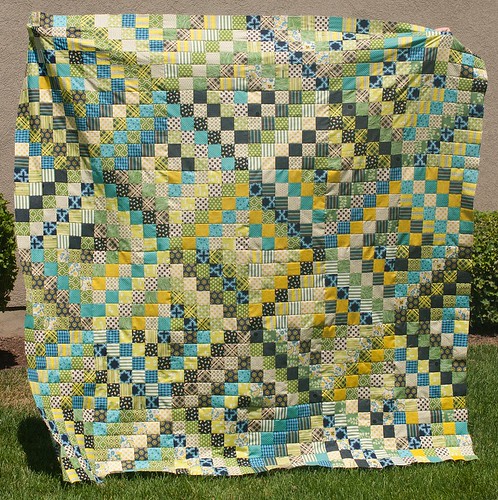
Chicopee et. al. Scrappy Trip Quilt Top

I always have these crazy ideas to make last-minute quilts. I like the excitement of getting caught up in a new project, but then I somehow manage to stress myself out because of the tight deadlines I put on myself.

I have a goal to make a quilt for everyone in my family. With five siblings and 17 grandchildren on my side alone, that makes for a lot of quilts. Two of my nephews are rooming together at college next week and I thought I'd better hurry and make quilts for both of them. One of the boys said he likes dark colors, something that I don't have a lot of in my stash. But, I did have a FQ bundle of Chicopee in the blue colorway and I thought that'd be a good starting point. I've been wanting to make a #scrappytrip quilt since the quilt-along craze popped up on Instagram, but since I was pushing myself to finish my WIP list, I put it off. But, then I thought a quilt for my nephew would be a good time to use the design.

As I said, the Chicopee FQ bundle was just a starting point. The scrappy trip pattern requires a lot of fabric. I initially wanted to make a quilt that was 7 x 9 blocks, but after calculating the needed yardage, it was going to be something crazy like 9 yards. So, I scaled back to a 5 x 7 layout, but I didn't like that, so I made a random block and changed the layout to 6 x 6. It used nearly six yards of fabric. Since the Chicopee bundle wasn't six yards-worth of fabric, I looked in my stash and started pulling some coordinating prints, including some Modern Meadow, Neptune, Architextures, Nicey Jane, Going Coastal, Roughing It, and a few others that I can't name off the top of my head.

Chicopee Scrappytrip Quilt Top

I really love how the quilt top turned out. I definitely plan to make another one to keep.

I basted the quilt Monday night (using a navy blue flat sheet for the backing), quilted it last night, and hope to bind it tonight so I can gift it on Thursday before my nephew heads up to school.

WIP Wednesday at Freshly Pieced

Monday, August 12, 2013

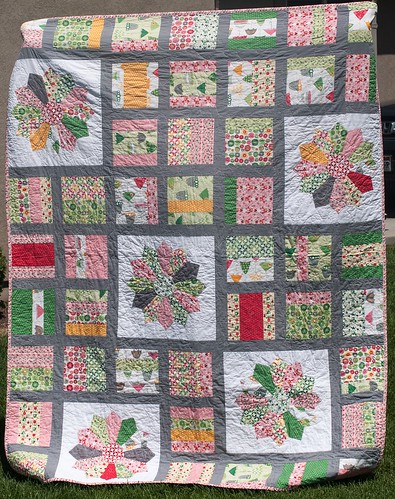
Finished Quilt for The Middle

Can I just start off by saying that I am so glad I finally finished this quilt?! I started this one two years ago. Normally, I'd say that's okay, but for this quilt it was way too long. A lot can happen in two years. The Middle has changed a lot; going from two to four (almost five) will do that. Thankfully, though, she still likes how her quilt turned out and I like that I could finally check it off my list.

Finished Middle Quilt

When I first drafted this quilt design, I had just finished a baby quilt using Elizabeth Hartman's Mixtape pattern for a friend. I had also just made Cherie's bee block using the Fat Cat dresden ruler. When I asked The Middle her opinion about her quilt, she said she wanted flowers. She chose this stack of Rainy Days and Mondays fabric that I'd had for a while and I thought the dresdens would make cute quasi flowers/umbrella tops. I love using graph paper to plan out new quilt ideas - it takes me back to my days of hand-drafting floor plans in my interior design classes - so when I merged these two ideas together, this is what I came up with.

The dresdens are machine appliqued onto Kona white. The sashing is a quilter's solid medium gray that I picked up from Joann's. The binding is the pink/red/green raindrop print from the Rainy Days and Mondays line, and the backing is just a solid pink flat sheet that I got from Target. I quilted the entire quilt in meandering loops. The quilt is a twin size, measuring 72" x 90" before washing.

Sunday, August 4, 2013

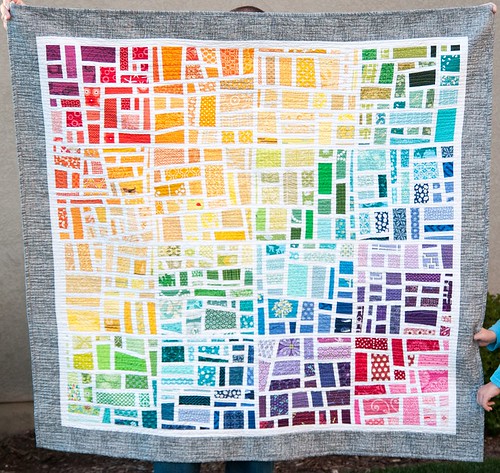
Finished Gradated Mod Mosaic Quilt

It's been nearly a year and a half since I started planning this quilt. I'm happy to finally show you the finished product! (Related posts can be found here.)

This first photo shows off the quilting really well. I quilted organic straight lines about a half inch apart across the entire width of the quilt. It took a little while, especially if I count all the hours I spent unpicking the previous quilting. But, I love the result.

Finished Gradated Mod Mosaic Quilt

This photo shows the colors as they truly are. (They look a bit faded in the first picture.)

Finished Gradated Mod Mosaic Quilt

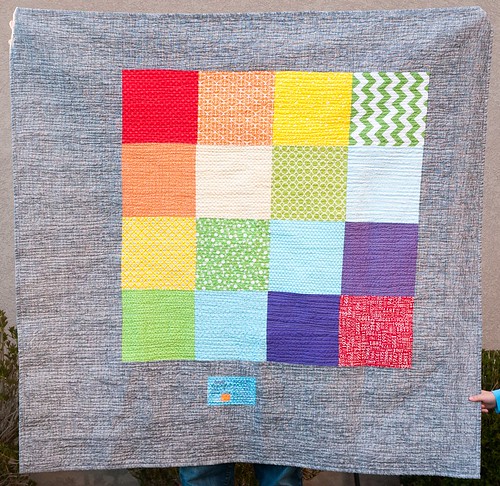
For the backing, I made a large patchwork to mimic the colors on the front. Then I offset the squares and added a border using the same black and white crosshatch print that I put on the front. The binding is the same print.

Finished Gradated Mod Mosaic Quilt

This quilt will happily be staying at my house. It's a good lap size. And with all the blood, sweat, and tears that went into making it, I don't think I'd be able to part with it anyway.

LinkWithin

Related Posts with Thumbnails