I bought a Frolic jellyroll a few months back without a specific idea of what to make with it. After the call from my brother-in-law, I set out on trying to figure out what sort of design to use for this charity quilt with the jellyroll. At our July quilt guild meeting, one of the girls brought a string quilt. I loved the look, but I'm totally intimidated by paper-piecing. Then I saw this pattern, which just so happened to use the Frolic line. After searching a bit more for inspiration, I read through Cluck Cluck Sew's easy double hourglass tutorial and knew I could find a way to fuse all these looks together. Here's what I came up with:
Note: The photos link to flickr so they're cut off a little on the right side.

I constructed each block using CCS's directions for the double hourglass blocks, but I made mine using three jellyroll strips.
I started by separating the jellyroll strips into sets of three, making sure to create contrast in the pattern and color, but also making sure the strips went well together. Then I took out my trusty ruler and cut each strip at 45 degree angles, alternating the direction of my ruler.
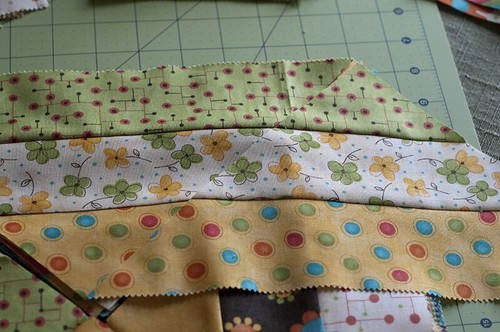
I was able to get five triangles from each jellyroll strip set. I paired four of them together as shown below. I reserved the leftover triangle for later use. Sewing the triangles into a block was tricky because of the cut being on the bias. When you sew something this way, you have to make sure not to stretch the fabric or else your block will bubble.
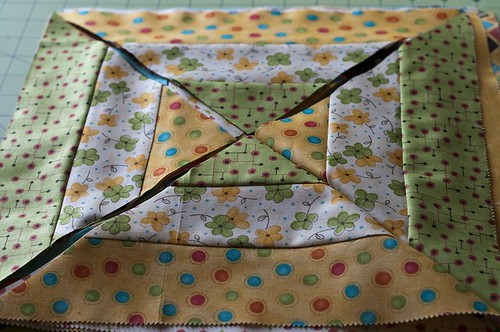
The 42 jellyroll strips gave me 16 12" blocks, 13 of them looked symmetrical like the one above, and other three were comprised of the leftover triangles, making them look a bit more scrappy.
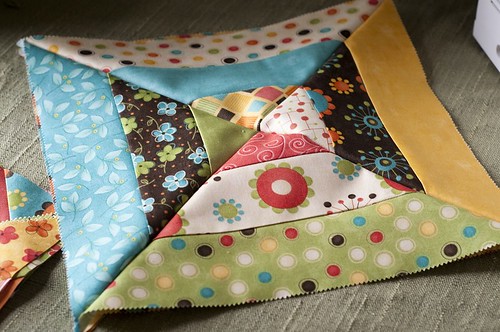
Each strip set had a bit more leftover so I cut a few smaller triangles and paired them together like so.
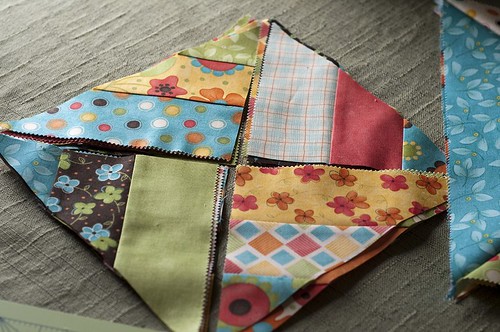
I had enough smaller triangles for six 8" blocks, but I only used four blocks as the corner posts at the ends of the borders.
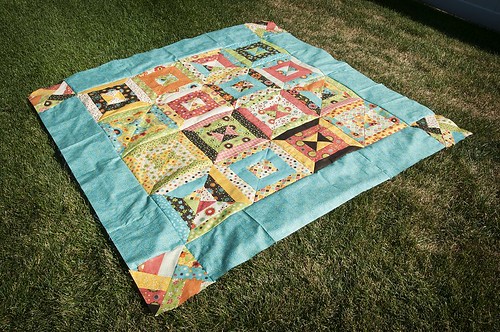
The quilt top measures about 60 inches square, a good size lap quilt. I need to pick up the backing material still and my deadline is swiftly approaching (September 15) so I best get crackin'. Hopefully the quilting and binding will go fast and I can hand this quilt off for the silent auction ASAP.
Linking up:


I constructed each block using CCS's directions for the double hourglass blocks, but I made mine using three jellyroll strips.
I started by separating the jellyroll strips into sets of three, making sure to create contrast in the pattern and color, but also making sure the strips went well together. Then I took out my trusty ruler and cut each strip at 45 degree angles, alternating the direction of my ruler.

I was able to get five triangles from each jellyroll strip set. I paired four of them together as shown below. I reserved the leftover triangle for later use. Sewing the triangles into a block was tricky because of the cut being on the bias. When you sew something this way, you have to make sure not to stretch the fabric or else your block will bubble.

The 42 jellyroll strips gave me 16 12" blocks, 13 of them looked symmetrical like the one above, and other three were comprised of the leftover triangles, making them look a bit more scrappy.

Each strip set had a bit more leftover so I cut a few smaller triangles and paired them together like so.

I had enough smaller triangles for six 8" blocks, but I only used four blocks as the corner posts at the ends of the borders.

The quilt top measures about 60 inches square, a good size lap quilt. I need to pick up the backing material still and my deadline is swiftly approaching (September 15) so I best get crackin'. Hopefully the quilting and binding will go fast and I can hand this quilt off for the silent auction ASAP.
Linking up:


23 comments:
The colours are pretty! Glaf you have the opportunity to give back/forward.
I love this and have been thinking of doing something similar with a jelly roll on my shelf. I really like your design of the corner blocks.
wow, you are very charitable!
i'd want to keep that for myself :)
it looks great :)
i'm a fabric addict, too.
this is my first time visiting your blog (came from quiltstory :) )
How generous of you to work this hard for a young boy you don't even know. I love the fabric and patterns.
That is a really nice quilt to make! I love that you are paying it forward, it's sweet.
What a cute idea. Love it! Thanks for linking up. (we can feature you twice you know?) email us when you want to do another feature!
Nice quilt and design! My haven't gotten that advanced yet. Thanks for sharing.
:)
Courtney
(I found you at AmyLouWho's linky party)
This is wonderful! I love the colors of this quilt. I'm sure it will be the star of the silent auction. Thanks for sharing!
Such happy and fun fabric. A lovely quilt for a good cause!
Great work on those blocks. Such careful sewing you did to get every seam to align so well! Congrats!!!
That is so cute. I don't know if you remember me, I was at the first modern quilt guild meeting we had. Your quilts are fabulous!
I'm sure someone at the auction will love it!
Brooke, I'm so happy to find your blog! This quilt is beautiful - and for such a lovely cause too. Way to go! And thanks for sharing the how-to's. Your pictures are so pretty and inspiring.
Very pretty quilt! It looks fantastic, and what a great way to share your talents.
Great Quilt!!! Ilove the colors!!
this looks great and for such a great cause...i am sure it will raise lots of money
Love your quilt top. Great pattern. I am hoping to use that pattern with some Dream On fabrics.
Brilliant! You have made a wonderful job with this quilt, and it is so generous of you to give it for a good cause, knowing all the work you have put into it.
What a great contribution to the silent auction! I love what you did with the corners.
So pretty! I think I could handle a quilt like that. I like strip piecing a lot. It seems to save so much time. I did some string blocks and they were way easier than I expected - you should try it!
thanks for coming to Sew & Tel!
The quilt is gorgeous. I love the fabrics.
beautiful and for a great cause. Good for you.
Your quilt top turned out beautifully.
Post a Comment