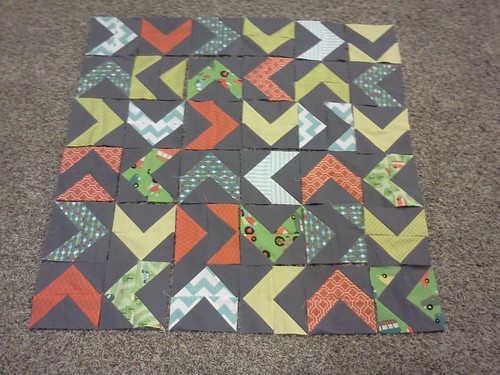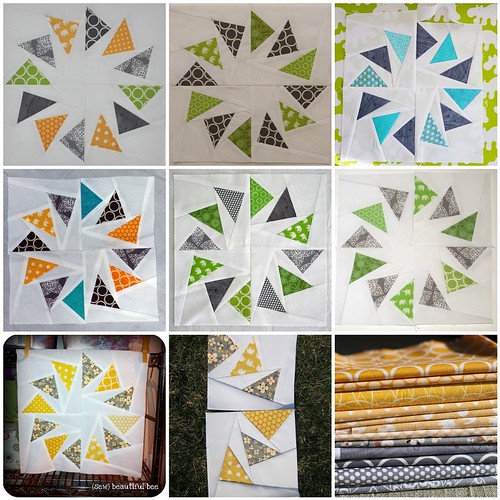
April has been my month in the Sew Beautiful Bee. In 2011, I asked my bee mates to make me circle of flying geese blocks using yellow, green, blue, and gray fabrics. It was fun to see the blocks begin to show up in the group photo pool.
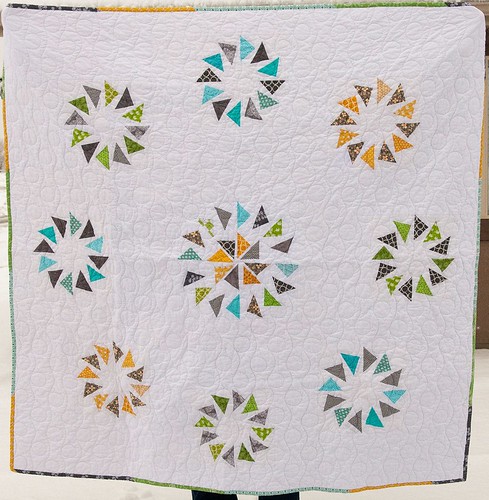
A year later, in April 2012, I finally got my act together to piece the center double circle of flying geese block and then pieced all the blocks together.
Then that quilt top sat for several more months until I finally pieced the back. By this time, Christmas was approaching and I knew I'd have to put it aside again. As the year came to a close, I decided that if I wanted to make a quick dent in my WIPs, I needed to be okay with the idea of sending some quilts out for quilting. (Before this past Christmas, the only longarm quilting I'd had done proved to be a bad experience. While the quilting looked nice, the lady charged me double what she quoted me PLUS she was really condescending about the design and fabric selection - not her style I guess, but she should have just kept her opinions to herself.)
Anyway, I talked with my good friend, Kayli, about doing the quilting for me and I think she did a great job! I really wanted there to be circles in the quilting since the whole design is circles upon circles. I really love the design she did and it wasn't something I had seen before.
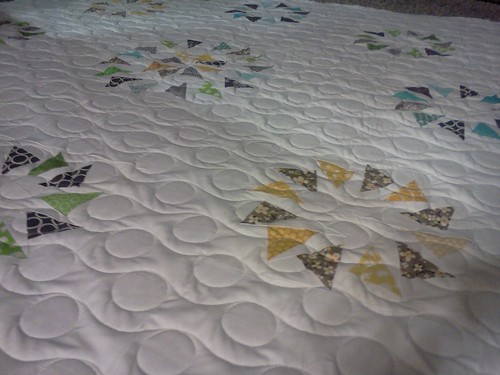
She also added two layers of batting, so not only is the quilt nice and heavy and warm, but the quilting really stands out. And with all that white space, it's even cooler!
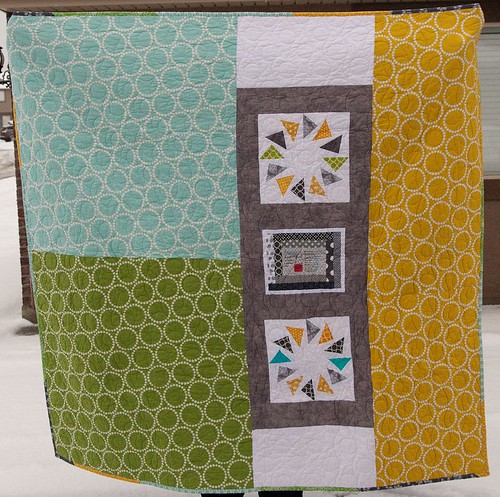
There were two blocks comprised of three colors, so I put those on the back with three colors of Lizzy House's Pearl Bracelets. (See? More circle repetition!) I also included the quilt label that Lee made for everyone in the bee that has all of our names and locations on it.
I made a scrappy binding of yellow, green, blue, and gray prints. (I'm really loving scrappy bindings right now!)
Quilt Stats
Size: 70x70 before washing
Design: Circle of Flying Geese paper piecing template found here; Double Circle of Flying Geese paper piecing template designed by Lynne of Lily's Quilts; design arrangement by me
Quilting: Kayli Taylor
Thursday, January 31, 2013
Sunday, January 27, 2013
Finished Madrona Road Challenge Quilt
As many of you know, I've been on a mission this year to finish all the WIPs I started last year (and...ahem...the year before) before moving on to anything new. When I tallied everything up, there were 12 projects in the works. That's too many for me. In fact, I was feeling a bit paralyzed last year because I knew there were all sorts of things waiting in the wings.
So.
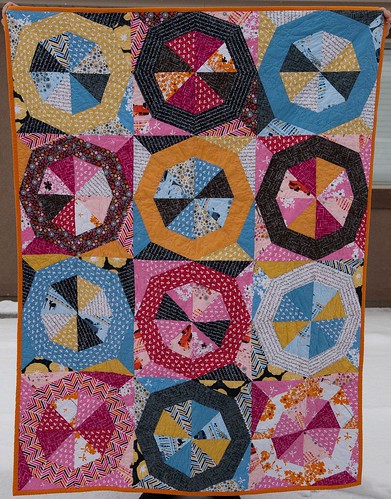
I've made good progress on those 12 items, even though I haven't stuck 100% to my goal of not starting anything new. One of those new projects I started (but am not really considering new only because I knew it was coming down the pipeline) was this Madrona Road Challenge quilt.
It seems like all the guilds participating in this challenge received the same blue colorway of Violet Craft's Madrona Road line. I used this as a good opportunity to buy some more prints, especially in the pink colorway. The requirements were that only Madrona Road fabrics and solid fabrics could be used in each project. And since we're a quilt guild, they recommended the project be something quilted. The additional requirement that the Salt Lake guild made is that we need to use triangles in the design somehow.
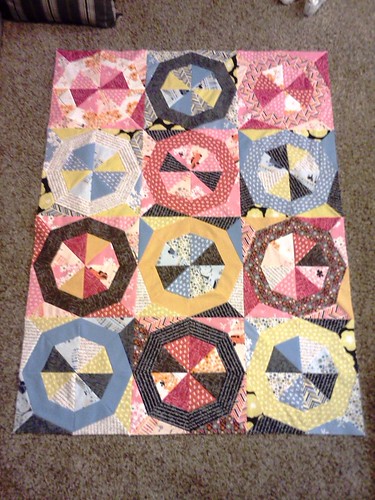
After debating for a while on what I should do, I finally settled on Anna Maria Horner's Spinning Stars pattern. I saw the pattern last year and printed a template so I could make it eventually. I was lucky to have it on hand when I decided to use this design one late Tuesday night.
Once I got started, I was a bit obsessive about this quilt and finished it in about a week and a half.
I made 12 blocks, alternating each block between the two colorways.
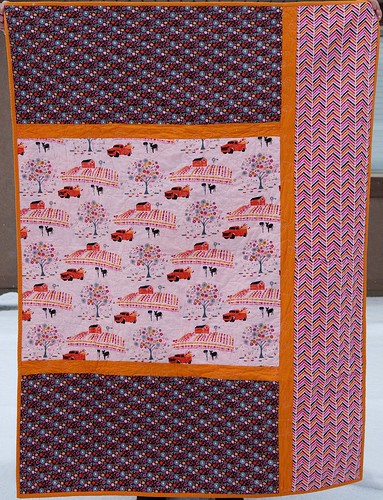
For the back, I used three prints from the pink colorway to piece a simple back. I bound the quilt in an orange Michael Miller Cotton Couture.
The quilt measured 54x72 before washing. (I didn't bother to measure it afterward.)
I quilted it in meandering double loops.
I can't decide if I want to keep this one or give it to one of my nieces, but it was fun to combine two things (the challenge and the pattern) into one quilt.
Labels:
challenge,
madrona road,
spinning stars,
violet craft
Wednesday, January 23, 2013
WIP Wednesday 1/23/2013
This is my first WIP Wednesday post of 2013. I thought it'd be a good time to check in and post a bit of my finish it 2013 progress. I've neglected my camera lately, so these photos are courtesy of Instagram (@pitterputterstitch).
Last year, I pieced a few quilt tops and then set them aside while I worked on other projects. My first order of business for 2013 was to get those quilt tops quilted. They were all bee quilts so I chose to send them off for quilting.
Kayli quilted my Sew Beautiful Bee quilt top from 2011, Circle of Circle of Circle of Flying Geese. She did such a great job! I've cut the binding strips for this and just need to finish making the binding so I can cross this quilt off my list.
Barbie quilted my SLMQG bee quilt from 2011, my 1001 Peeps Supernova quilt (photo courtesy of Barbie). I love the wavy line quilting she did! The binding strips are cut and ready to turn into binding for this one too.
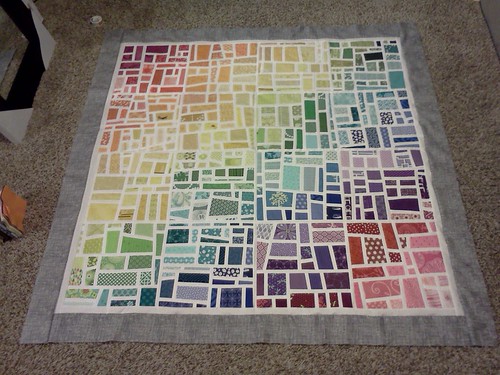
The last quilt top I sent off for quilting is my Gradated Mod Mosaic quilt top, my 2012 Sew Beautiful Bee quilt. I haven't gotten this one back yet, but I'm really excited for it!
Next up on my WIP list is my Madrona Road Challenge quilt. I initially wanted to make a quilt with a lot of Lynne's ET Phone Home blocks,
but then I changed course and went with Anna Maria Horner's Spinning Stars pattern instead. I've been wanting to make a quilt like this so I figured I may as well kill two birds with one stone.
I hope to finish this one up next week in time for the Modern Quilt Guild's deadline.
I also finished a quilt top for my new nephew.
I plan to baste this one when I baste my Madrona Road quilt. Then I need to get back to this baby, my Castle Peeps Lucky Square quilt. The mister is really looking forward to having a quilt of his own. This pattern is by Jessica Kelly and is for sale here.
Linking up to Lee's:
Monday, January 14, 2013
Lucky Squares Quilt Pattern Testing
Sometimes being a technical writer by trade has its perks. Like when you get to take a break from writing and editing software documentation and instead edit and test quilt patterns. I’ve recently had the opportunity to edit Kati’s first two patterns as well as test and edit Jessica’s pattern that she released today.
I haven’t finished making the quilt from Jessica’s pattern yet, but I thought I’d share some of my process photos. (Some of these are from Instagram – I’m @pitterputterstitch if you want to follow me – so please excuse the blur factor.)
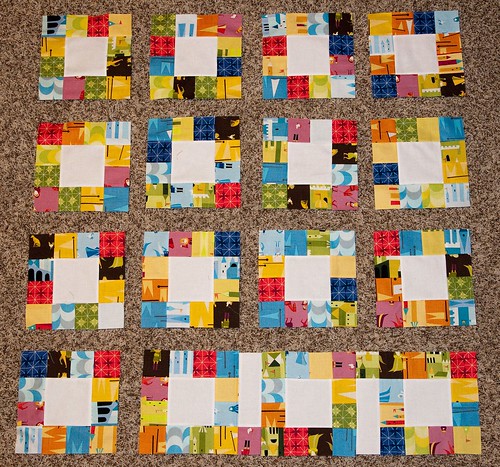
When I first showed the pattern to the mister, he loved it. Since I’ve never made a quilt for him in the three years I’ve been quilting, I thought it was high time I do. So, we checked out my stash and he picked a fat quarter bundle of Lizzy House’s Castle Peeps line that I’ve been saving for a couple years. I think the bright colors of this line really lend themselves well to Jessica’s pattern.
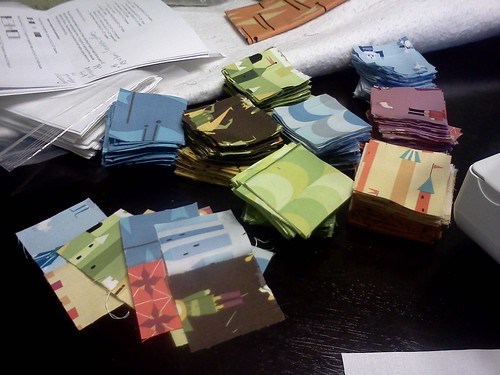
I set to work cutting the fat quarters,
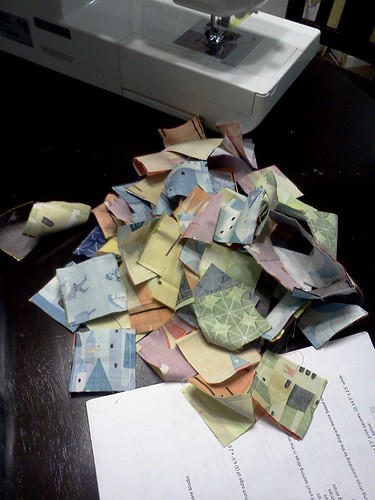
chain piecing the 2.5” squares,
adding some of the sashing strips,
and piecing the blocks assembly-line style.
I’m making a twin size quilt for the mister, so I have 47 blocks to go. If you’re interested in purchasing Jessica’s pattern, she has it on sale right now for $6.50 from Craftsy and her pattern shop. She also posted some photos of her quilt and quilt tops that other pattern testers sent her on her blog today, so check those out.
Also, if you’re looking for anyone to edit a pattern for you, I’d be happy to help out.
I should have a sign that says, “Will edit for fabric.”
*****
Kati released her second pattern today. Head over to her blog and check it out too.
Thursday, January 10, 2013
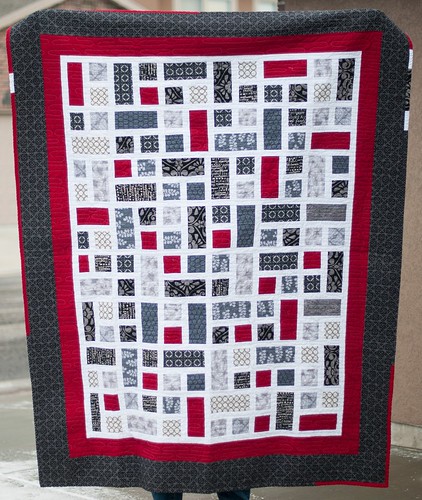
Finished Rectangle Squared Quilt for My Sister
A long time ago, say two years or so, I started a quilt for one of my sisters. She picked the design then I bought the fabric, made a few blocks, and gave her those blocks for her birthday. Unfortunately, I've learned that without deadlines sometimes I don't finish what I've started unless I have a little bit of...um...encouragement.
A couple months before Christmas, my sister started talking more and more about the quilt on her bed (I think she was dropping hints that she wanted me to finish the quilt I'd started for her). Then my mom, not so discreetly, told me that my sister wanted a new quilt for her bed. So, I kicked it in high gear and finished the quilt. And, it ended up being my favorite Christmas quilt finish!
I used the rectangle squared block tutorial by Ashley over at Film in the Fridge.
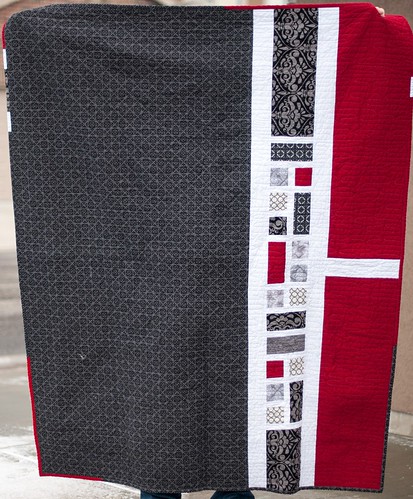
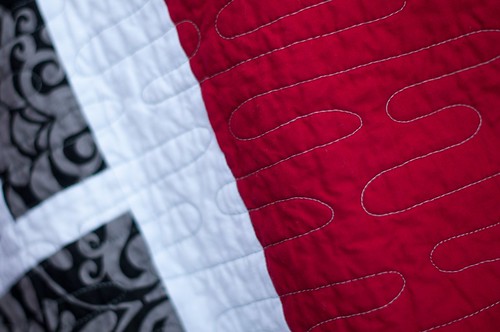
I used a variety of gray and black print fabrics with Kona red and Kona white for the blocks and sashing. For the border and most of the backing, I used a damask print from some Halloween fabric line that was on sale at my LQS last year. I used the rest of the blocks and actually pieced a back (gasp!) and I kind of love how the whole thing turned out.
The finished quilt measures just under 70" x 90".
Tuesday, January 8, 2013
Finished 4x5 Bee Quilt
At the beginning of 2012, Sukie wrangled me into joining the 4x5 bee as she was taking over as the head caretaker. I signed up for one round, but then life got busy and I didn't commit to any other rounds. As 2012 was coming to a close, I decided I better do one final round so the lonely blocks I received earlier that were sitting in a drawer could join others and be made into a quilt.
For Christmas 2011, I had gifted my sister and one of her daughters quilts. I don't remember what exactly he said, but my brother-in-law left me with the impression that he wanted a quilt too. As I was trying to come up with handmade gifts for family for Christmas in 2012, I figured this 4x5 bee quilt would be great for my brother-in-law.
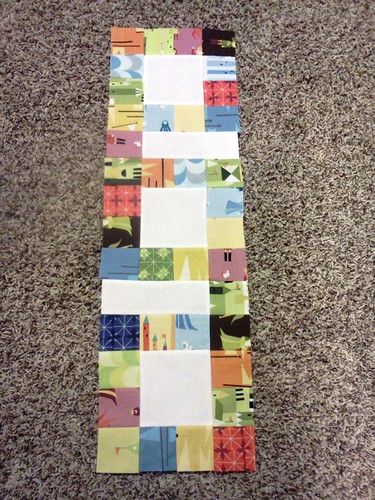
I had received 10 blocks (5 from each round I participated in). Since I had a red sheet on hand and didn't want to piece the 10th block into the backing, I asked the mister to pick his favorite (top middle in this photo) so I can make him something with it. The rest of the blocks were pieced into the top.
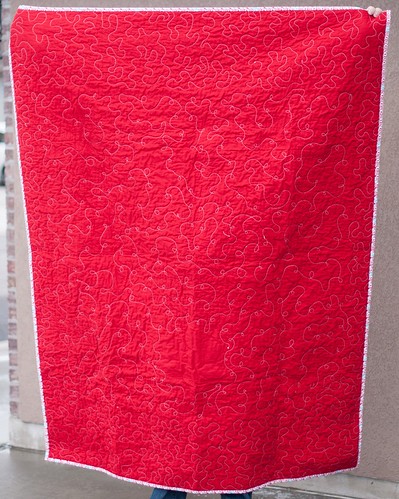
I needed to make the quilt a bit bigger so I added a border of Laurie Wisbrun's Perfectly Perched that had the aqua and red color scheme I was going for.
Like I mentioned before, I used a solid red sheet for the backing. For the quilting, I tried stippling for the first time (in the border). It was hard not to want to cross over those lines, but I'm sure it'll get easier with practice. The rest of the quilt is my typical meandering loops. There's one blank space in the quilting because I didn't want to quilt over the hexagon block since it had some hand stitching in it.
For the binding, I used one of the swirl prints from the Perfectly Perched line.
The quilt measures approximately 56x62 inches.
Sunday, January 6, 2013
Finished BIL and SIL Quilts
Every year for Christmas on the mister's side, we draw names for a gift exchange. Each grandchild gives to another grandchild and then the adult children/siblings give to each other. Last year, we had the mister's sister and I made her this Color Beads quilt. I decided then that I want to make a quilt for each adult whose name(s) we draw. So this year, we had the mister's twin brother and his wife for Christmas. As an extended family, we've set a limited dollar amount for gifts, but a friend was getting rid of some fabric that just happened to be the perfect colors for my sister-in-law, so I was able to make both my brother- and sister-in-law quilts.
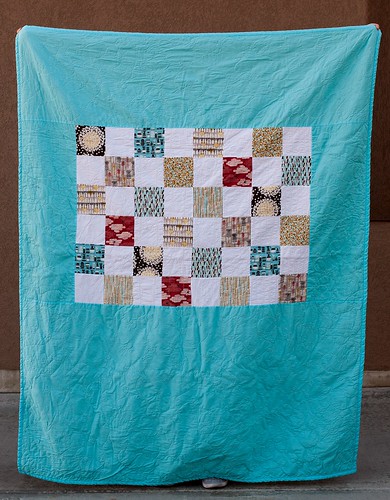
First up, my brother-in-law. He's really smart. Like super high IQ and even back in high school, I remember him liking chess. I wanted to use a charm pack of this Cloud 9 fabric that we got at Sewing Summit, but since there weren't very many charms, I added some charms of Kona white and gave it a chess/checker board feel by alternating the print fabric and the white charms. To keep within our dollar limit, I offset the center patchwork with a bright blue sheet that I had on-hand as the border.
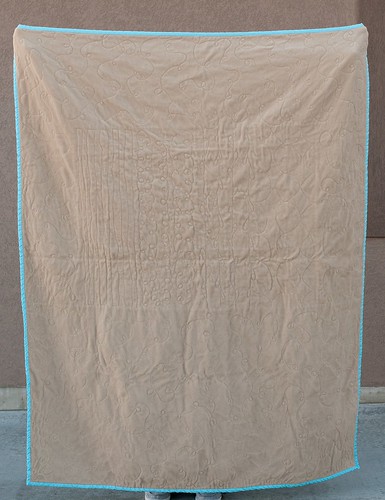
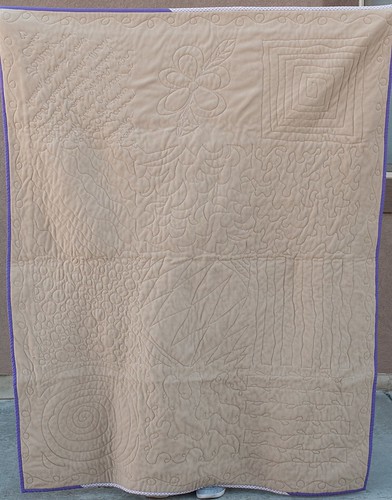
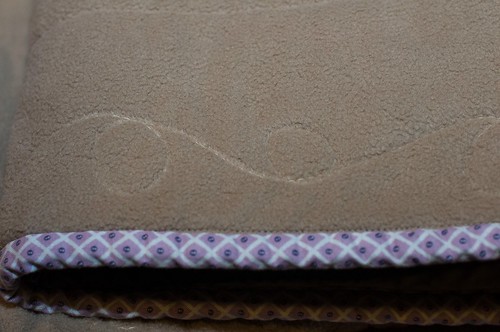
I backed it with a fleece throw that I got Black Friday shopping. I also wanted to experiment a little since I'd never used this as a backing before. I didn't add any batting and it really gave this quilt more of a blanket feel to it.
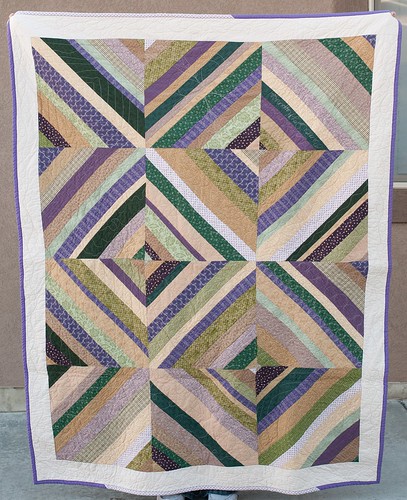
For my sister-in-law, I used these various purple, green, and cream fabrics to make large 16" finished string blocks. I played around with the layout and liked this one the best.
I added batting to her quilt and while it made the quilt really heavy during the quilting process, I prefer the added weight. It made it feel like the quilt had substance while my brother-in-law's felt a bit flimsier.
I also used her quilt to practice some new free-motion quilting techniques. I did a different design in each block. Some turned out great. Others a little meh. I used the same fleece throw for the backing and it really shows off the quilting nicely.
In the border, I quilted these big loops. I really liked how the border turned out.
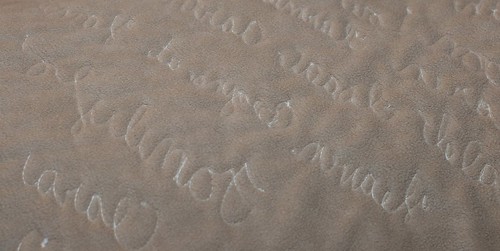
In this block, I free-motion quilted a bunch of words about family and love as well as her full name and the names of her husband and kids. This was a first for me, and I was really pleased with the result. (Since the quilting showed up so much better on the back, that's what the picture is of. Unfortunately, the writing is in reverse.)
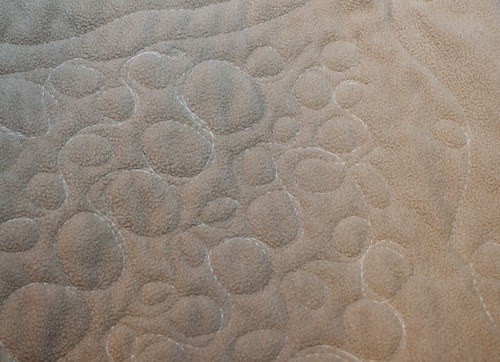
In this block, I did a little pebble quilting, basing the size of the pebbles on the width of the strips I was quilting. I really like the varying sizes all together on the diagonal like this.
Both quilts were well-received. It will be fun to continue this tradition next year with another set of siblings-in-law. Hopefully the mister's remaining brother and sister are okay getting quilts from us for the next couple years.
Friday, January 4, 2013
Planning the Attack
Remember all the works in progress I listed in my fabric tracking post? Well, over the last several months, I've found myself making the same to-do lists over and over. I guess I figured identifying the same quilts in progress several times would help me keep track of them better. Well, it hasn't worked and I've found myself not always able to keep my head around what I've started and intend to finish first thing in 2013.
So, I thought about how I could better keep track of all these WIPs. Enter Excel! I don't know why I didn't think of this before, but I finally sat down today and entered all my WIPs into a simple spreadsheet where I've noted the status, plan of attack, finish by goal, and priority.
I think this is the ticket! I can easily see at a glance what I need to do with each quilt. Since it's in a spreadsheet, and since I've already been in the habit of tracking my fabric purchases, I think this method is finally going to click for me and help me know what it is that I need to accomplish before starting anything new.
First up, I need to turn those quilt tops into finished quilts. I have three bee quilts ready to go. I usually quilt my own quilts, but since these three have been sitting around for months (4, 9, and 13 months to be exact!), I decided it's totally okay to farm the quilting out to two of my longarm quilting friends as well as a fairly local quilter who provided a coupon for services at Sewing Summit (hooray for discounts!). That should help shorten my to-do list pretty quickly right off the bat.
I'm having a hard time not caving in and starting my own scrappy trip around the world quilt. But, I've made a resolution to finish all these other items on the list before I go jumping on any bandwagons. Wish me luck.
Wednesday, January 2, 2013
Christmas Sewing 2012 Part 1: The Bags, The Pouches, and The Randoms
Every year for Christmas, I try to tackle a few handmade gifts. Not all my recipients are lovers of handmade goods, and I know that realistically, I couldn't make handmade gifts for everyone even if I wanted to. Here are the non-quilt things I managed to eek out before Christmas.
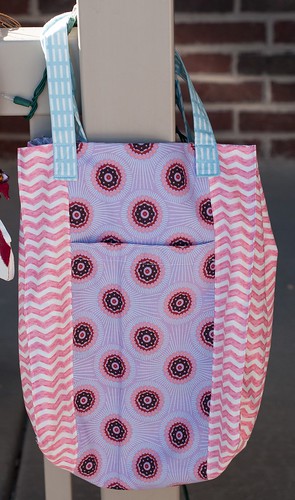
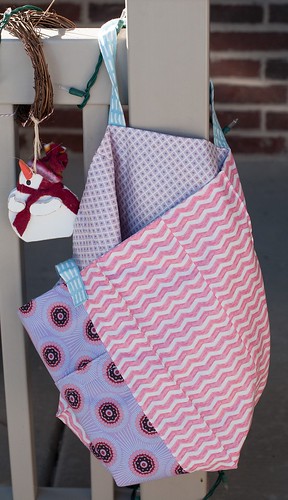
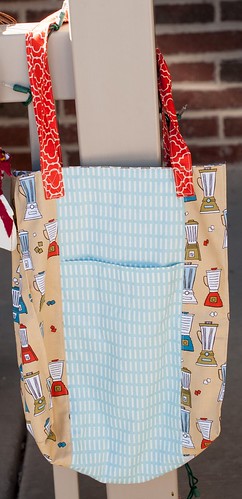
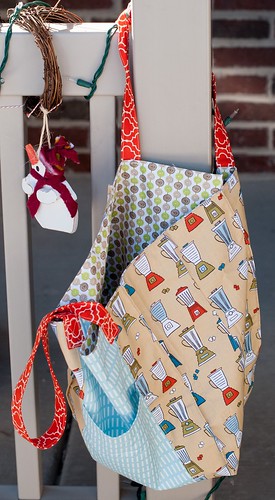
I made this Jane Market Bag for one of my nieces. She loves pink, blue, purple, and yellow so I combined some fabrics from my stash, and was actually kind of shocked to have enough yardage in the pinks and purples to put this bag together for her.
The fabrics are from Anna Maria Horner, Sarah Jane, and Aneela Hoey. I can't remember the designer of the inside fabric, but I think it's called Trellis in Purple or something like that.
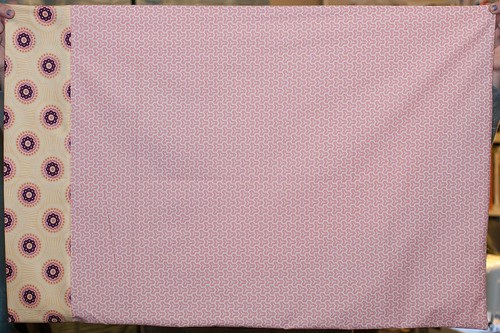
I also made the same niece this simple pillowcase using a Joel Dewberry print and the same Anna Marie Horner print, but in a different colorway. It came together nicely, but I really think having a trim would have added that much more to the pillow. Tutorial here.
My mom's friend spends Christmas with us every year. She likes to shop so I made her a Jane Market Bag too. This one in a Robert Kaufman (?) blender fabric with Aneela Hoey, and a Riley Blake print on the inside.
Pattern available here.
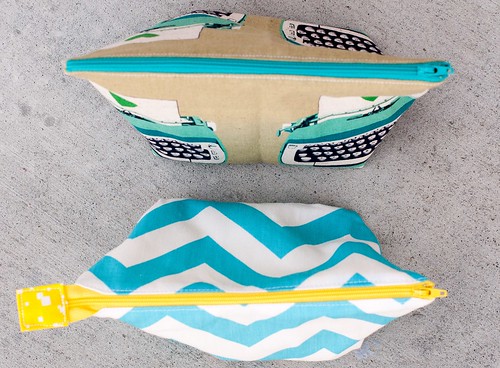
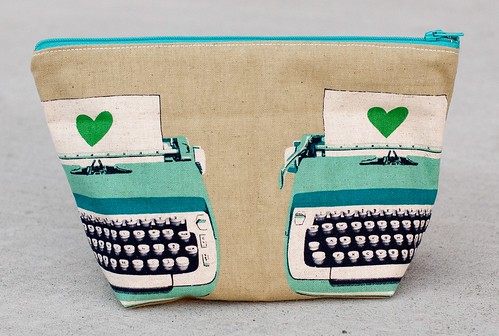
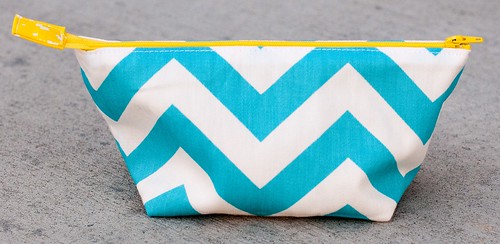
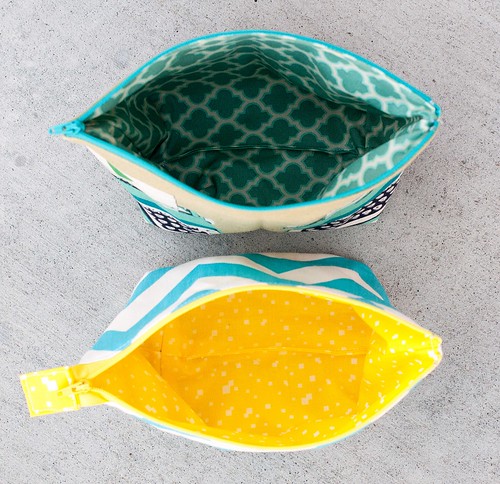
For my coworkers, I had grand plans to make zipper pouches and fill them with useful items (hand sanitizer, band-aids, etc.), but then I realized I had zero time before Christmas and ended up scrapping the plan after making these two pouches.
One did go to a coworker and fellow quilty friend...
...and the other was sent to a far-off friend as a New Year's gift.
I used Anna's open wide zipper pouch tutorial for the zig zag pouch. I love her tip for the beginning of the zipper, and have started incorporating that technique into the pouches I've made since.
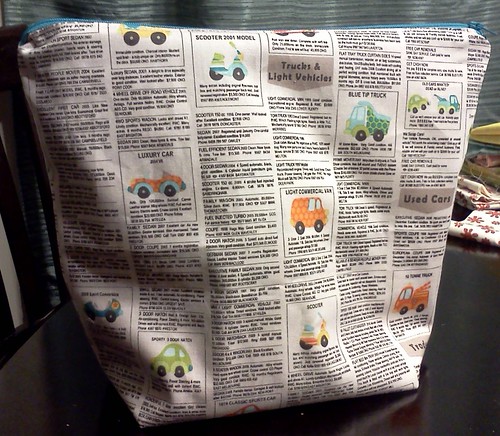
I made a few more various-sized pouches. This first one is for holding some of my son's cars. It doesn't have an interfacing of any kind, which makes this more of a bag and can mold around his cars easier.
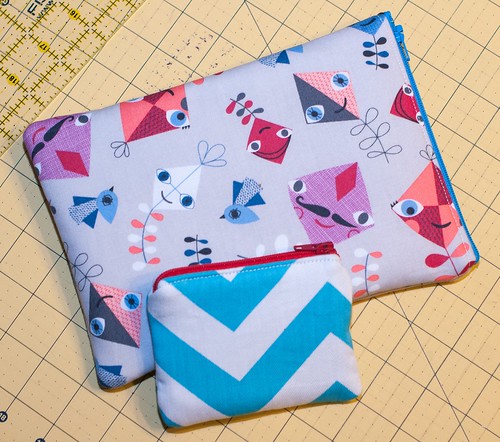
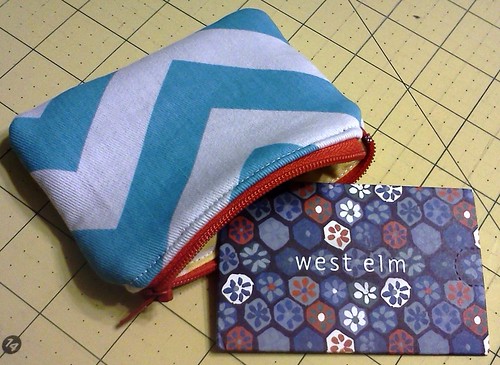
For my mother-in-law, we gave her a gift card to West Elm. I made a small pouch to hold the gift card and it can double as a coin purse.
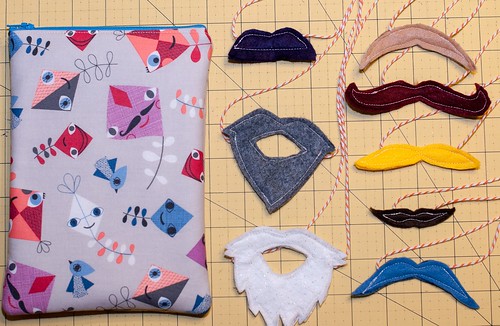
The last pouch I made was to house this set of felt mustaches for my nephew. I thought that mustached kite was pretty cute too.
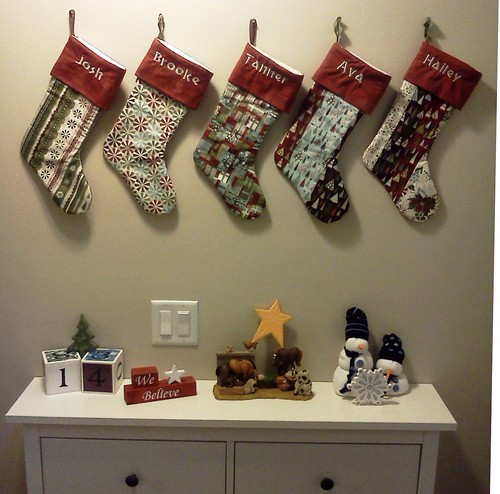
Oh, and I made stockings for my family this year. I used leftover pieces of fabric that I'll (eventually) be making my Christmas quilt out of, Figgy Pudding by Basic Gray. I used the stocking tutorial from Fabric Worm - it has the best shaped foot to it. Then my sister embroidered the names on the cuffs with her embroidery machine for me. I didn't have enough fabric to make each of them out of a single print, which I like the best out of the five I made. I wish I would have pieced the last two with strips running in a different direction. Maybe I'll remake those two. Or maybe not.
That wraps up part 1 of my Christmas sewing. Up next, the quilts.
Tuesday, January 1, 2013
2012: Year in Review
Happy New Year! It's 9 o'clock on January 1st and I'm ready for bed. But, I realized I hadn't posted the mosaics of my 2012 projects. Here's a short and sweet round-up of what I made (and a few things I received) in 2012.
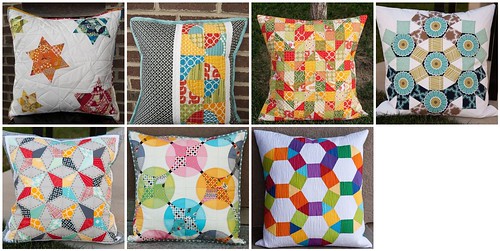
Pillows - I really enjoyed making a few pillows this year. I participated in two rounds of the Pillow Talk Swap on Flickr. I've said it before and I'll say it again: this is by far my most favorite swap to participate in. I've been extremely lucky to have been partnered with some really amazing women and this swap has stretched me more than any other.
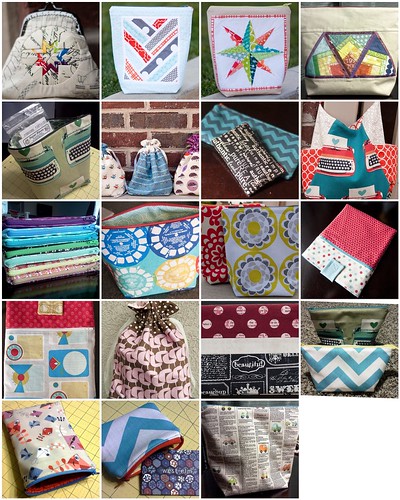
Bags and Pouches - The zipper has become my new best friend. I've enjoyed experimenting with different sizes of pouches (both the beginning cut fabric size and the gusset depth) and different types of interfacing. There were some days that I felt like a pouch-making machine, and this is definitely one of my favorite go-to, quick gift projects. I also made my favorite bag ever this year: my 241 tote that I use as my purse and get compliments on all the time. Melody Miller's typewriters have been one of my favorite prints of the year.
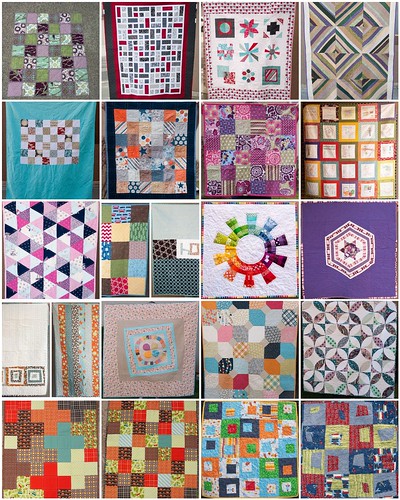
Quilts - Of course, my main sewing emphasis this year has been on quilts. I managed to make 20 quilts this year, finishing the first two in April (why did I waste those first four months?!). The mister made his first quilt too and I couldn't be a prouder missus. I made a few quilts for Christmas gifts and will be posting about those over the next couple weeks.
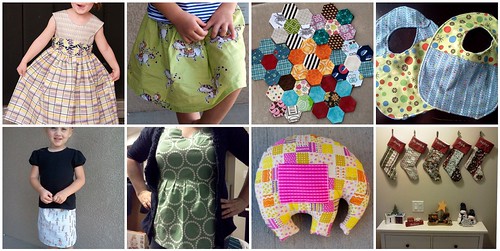
Everything Else - I also tried my hand at clothing construction. I am not a seamstress. I have a hard time understanding the three-dimensional aspect to apparel sewing, but even so, I managed to make myself a Washi tunic and The Middle an Easter dress (it's amazing that thing came together as well as it did since I adjusted the bodice measurements myself). The skirts I made The Middle have been a huge success and I'm sure there will be many more in 2013.
I've spent some time mulling over the goals I have for myself in 2013. In years past, I've focused on specific quilts I wanted to make. And to tell you the truth, I don't think I accomplished even 50% of that goal. For 2013 I want to really focus on quality over quantity. I want to enjoy what I'm making and not pick a quilt design based on its level of difficulty. I'm sure I'll still make a few patchwork quilts this year (I really do love simple patchwork), but I want to stretch myself and focus on learning new techniques and making things that I really really love.
I also plan to not buy fabric this year (gasp! Typing that was hard!), with the exception of neutrals for sashing and such. In fact, I will probably buy a bolt of Kona white in the next few days just so I have it on hand all year. I am also going to try to piece more backs so I hopefully can eliminate fabric purchases there too.
Lastly, I have several quilt tops that need to be finished up. I definitely intend to knock those off my to-do list as soon as I can. (I'll probably be sending a few larger quilts your way, Barbie and Kayli!)
Anyway, that's a wrap!
Labels:
bags,
pillows,
quilt,
year in review,
zippered pouch
Subscribe to:
Posts (Atom)