Showing posts with label rotary cutting. Show all posts

Thursday, October 7, 2010

Coins for Clara Quilt Top

My SIL had a baby back in July. She's the first baby born in the family since I've started quilting so I thought it'd be fun to make her a quilt. I was going to give her this one originally, but I gave the mama a choice between Freebird and Tweet Tweet. My SIL wanted fabric that was a little more juvenile (this is her first girl after having three boys, after all), so she opted for Tweet Tweet. I had bought a couple charm packs a while back to make Crazy Mom Quilt's stacked coins quilt, but then opted to do something more similar to Oh Fransson's charm square baby quilt.

(As a side note, I folded the top up last night and really should have pressed it before taking pictures this morning, but I'm lazy and this will have to suffice. Just squint and try to pretend there are no wrinkles.)


I made six rows of the coins, separated by one Moda Bella Solids jelly roll strip. To frame the rows, I cut two jelly roll strips in half lengthwise and made a narrow border. Then I took some of the remaining half charms, sewed the short ends together and made a final outer border.

Thanks to my daughter for being such a good helper in her jammies. (She turned two last Friday and we chopped her hair Saturday. She looks so grown up now!)


I think if I were to make this quilt again, I would use fewer fabrics so it's not so busy. Or maybe I would just pick a charm pack that had better contrast throughout. A lot of these fabrics kind of run together and make the quilt a bit busy. But, it should be good visual stimulation for Baby Clara, right?


Monday, August 30, 2010

Charity Quilt Top

A couple weeks back, my brother-in-law asked if I'd be willing to make a quilt to donate for a silent auction. There's a little boy in his neighborhood with Cerebral Palsy. The whole neighborhood has banded together to raise money for this little boy and his family. At various times in my life, my family has been the recipient of such kindness and I wanted an opportunity to pay it forward.

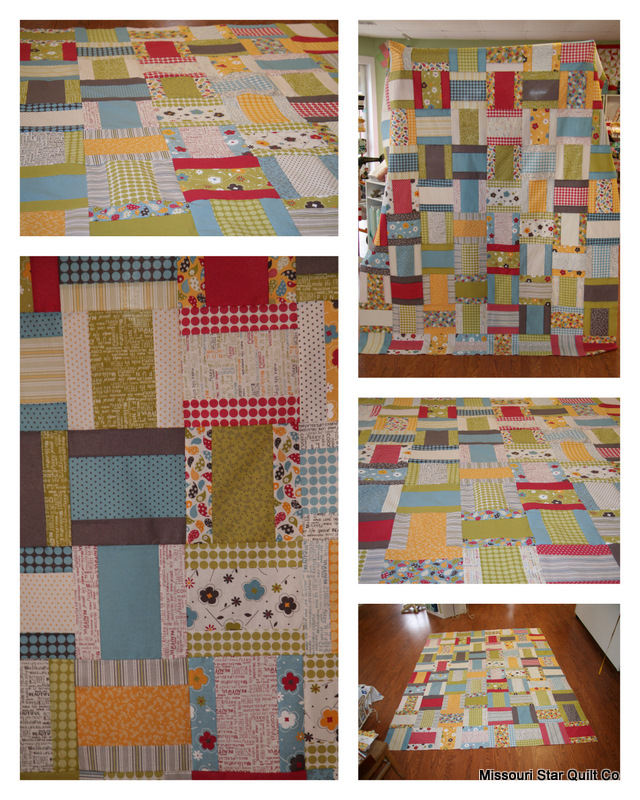
I bought a Frolic jellyroll a few months back without a specific idea of what to make with it. After the call from my brother-in-law, I set out on trying to figure out what sort of design to use for this charity quilt with the jellyroll. At our July quilt guild meeting, one of the girls brought a string quilt. I loved the look, but I'm totally intimidated by paper-piecing. Then I saw this pattern, which just so happened to use the Frolic line. After searching a bit more for inspiration, I read through Cluck Cluck Sew's easy double hourglass tutorial and knew I could find a way to fuse all these looks together. Here's what I came up with:

Note: The photos link to flickr so they're cut off a little on the right side.
Frolic Charity Quilt

I constructed each block using CCS's directions for the double hourglass blocks, but I made mine using three jellyroll strips.

I started by separating the jellyroll strips into sets of three, making sure to create contrast in the pattern and color, but also making sure the strips went well together. Then I took out my trusty ruler and cut each strip at 45 degree angles, alternating the direction of my ruler.

Charity Quilt, Strip

I was able to get five triangles from each jellyroll strip set. I paired four of them together as shown below. I reserved the leftover triangle for later use. Sewing the triangles into a block was tricky because of the cut being on the bias. When you sew something this way, you have to make sure not to stretch the fabric or else your block will bubble.

Charity Quilt Block

The 42 jellyroll strips gave me 16 12" blocks, 13 of them looked symmetrical like the one above, and other three were comprised of the leftover triangles, making them look a bit more scrappy.

Charity Quilt Block, Varied

Each strip set had a bit more leftover so I cut a few smaller triangles and paired them together like so.

Charity Quilt Block, Post

I had enough smaller triangles for six 8" blocks, but I only used four blocks as the corner posts at the ends of the borders.

Frolic Charity Quilt

The quilt top measures about 60 inches square, a good size lap quilt. I need to pick up the backing material still and my deadline is swiftly approaching (September 15) so I best get crackin'. Hopefully the quilting and binding will go fast and I can hand this quilt off for the silent auction ASAP.

Linking up:
Fresh Poppy Design


Sunday, August 8, 2010

Straight-edge whirligig block

*If anyone knows what this block is called, please let me know.*

While piecing Jessica's Freebird Picnic quilt, I played around with different layouts for the 4.5 inch squares and decided to try a version of a whirligig block with straight edges.


I used two charm packs, one Freebird and one neutral. This would be an easy block to chain piece by alternating sewing a Freebird charm to a neutral charm. Once you have a strip of charms 84 pieces long, you can cut in half of each charm, giving you your 4.5 inch squares.


I sorted my new squares by pattern and then by color. For this quilt, I wanted each whirligig block to be mostly the same color, or same two colors. I tried to vary the pattern in each block, but with the same overall color(s).


When I pieced the blocks, I made sure to align my center points and worry about trimming the blocks down to about 8 inches before piecing the top.


The quilt will consist of 30 blocks, six rows by five columns. At around 40x46 inches, it'll be a nice baby quilt. My sister-in-law just had a baby girl a couple weeks ago, so this little quilt will be perfect for Baby Clara.


I've been pretty MIA this last week. I'm trying to finish up Jessica's quilt so I can get it to her next Sunday at our family dinner. I have the free motion quilting to finish (which looks pretty sad when you see the white thread against the brown backing - there's definitely room for improvement there). I'm also going to try a different quilting pattern on the border to give it a little more personality. Then I need to make the binding and attach the label. I'll post photos of the finished product before I hand it off next weekend.

Tuesday, July 13, 2010

Freebird Picnic Update 1

I finished sewing the jelly roll strips, cutting the 4.5 inch sub-units, and pressing the seams for all 436 of these babies. Let me say that ironing for two hours straight is not my idea of a good time, although cutting before pressing was easier for me. (My sister teases me that I love ironing so much that I take time to iron my underwear. So not true. And even if I did love ironing that much, I certainly wouldn't after yesterday's lengthy stint.)


I thought I might get to piecing them last night, but it took me until 9:30 just to figure out the layout. Here's the start of it, and please excuse the poor lighting. I used my point-and-shoot camera because I was tired and lazy and wanted to get the blocks organized.


Although my SIL picked this design, it was fun to play around with different layout possibilities. It certainly got me thinking about future quilt designs.

Tonight I'll start piecing these units and see how far I can get. Cross your fingers that everything will match up for the most part.

Friday, June 25, 2010

Starting Jessica's Freebird Picnic Quilt and Making Progress on Not Quite Nutty as a Fruitcake

Whoa, that was a lengthy title.

My sister-in-law commissioned me to make a quilt for her bed. She picked the design and the fabric and I set to work on it Wednesday night. The pattern requires a jelly roll of the desired fabric and a neutral jelly roll to yield a square quilt. Because I'm making a twin size quilt, I bought an additional charm pack of each type of fabric so I can add an extra row of the design. My SIL chose the fabric for the backing (also to be used as a 4 inch border around the perimeter of the design) and the binding fabric.

I started off cutting the Freebird charm pack in half, giving me ~80 2 1/2 x 5 inch rectangles.


I then took the Moda Bella Solids Snow charm pack and sewed a rectangle to either side of the charm square.


The next step will be cutting the new units down to two 4 1/2 inch squares. This will give me the subunits needed to start creating the layout. After that, I can follow the tutorial by sewing each Freebird jelly roll strip to a Snow strip along the long edge and then cutting the new pairs into 4 1/2 inch squares again.

I love when fabric looks even better in person than when you see it online. I liked Freebird when I first saw it, but some of the prints that I was only so-so on looked so cute in real life, like these butterflies...


and these grande dots.


*************

Since I like to work on multiple projects at a time, I'm making a disappearing nine-patch quilt to gift. I started this one back in May when I started Frolic Around the House and Peekaboo Blush. These blocks have been sitting around for a few weeks. I used three charm packs, sewn into 12 nine-patch blocks. I had enough charm squares to make 14 blocks, but I only want 12 for this quilt. After sewing the nine-patches, I cut them in half vertically and horizontally to get the start of the disapearring nine-patch.


I played around with layouts for a while, but settled on this symmetrical, formal design because I think it will suit the recipient the best. There will be 12 of these new blocks and they'll each be separated by sashing of Moda Bella Solids in Milk.


Since the last two quilts I made were done in a short timeframe, I'm hoping I can whip these babies out pretty fast as well. I guess we'll see. I feel obligated to get Jessica her quilt as soon as possible since it's not something just for me to use around the house. It all depends on the mister's work schedule since I usually sew on the nights when he's working late.

I'm also REALLY wanting to make new throw pillows for my living room. Kati brought two of her recent pillows to our quilt guild meeting last week and I seriously was drooling over them. One more thing to add to my to-do list.

Thursday, May 6, 2010

Block #5

For some reason, I really struggled with this block for the Jelly Roll Sampler Quilt Along. I like the color combination, but I had to unpick a few pieces several times. Ah well, chalk that up to gaining experience.


Wednesday, April 28, 2010

Make Life Baby Quilt

When I bought the fabric for the Life Is What You Make It quilt, I bought a couple extra charm packs. I only used eight or so squares on the back so I had several squares left over. I put them to use tonight on this baby quilt.


I'm using this quilt to practice my free motion quilting so I didn't want to spend a ton of time on the quilt top, but I also didn't want it to be basic 5" squares in rows and columns.

I started by pairing and piecing four squares together in a variety of colors and prints.


Then I cut each set of four squares once on the diagonal.


And then paired each with a different cut half.


I used 64 squares, laid out like so (with my daughter's help).


See how the new square sets make an X?


I added a two-inch border of green on green dots around the perimeter of the quilt to increase the size.


It's about 38" square.


The backing will be the white paisley print since I had just the right amount left over from the other quilt.


I haven't decided what fabric to use for the binding yet. I don't have enough of Make Life, so I may just pick a nice solid from Joann's when I get to that point.


This is the first baby-sized quilt I've done (except for the rag quilts I made a couple months ago), and I love how quickly it came together. All pieced in one night? That's my kind of project.

Friday, April 2, 2010

Block #3

Here's my third block in the Jelly Roll Quilt Along. I played around with a few alternate layouts after I cut the fabric, but realized that my OCD tendencies forced me to have symmetry with this block.

Click the photo to view it on Flickr (and to take a peek at some of the other participants' blocks).

Block #3

Here are all three blocks together (and a cute little hand courtesy of my three-year-old).


Saturday, March 27, 2010

Progress

I was busy last night. I've had a sick little boy at home and been needing some respite from wiping his nose. So this is what I worked on:


This is the block that I made three years ago as my first attempt at quilting. Unfortunately, this single block was the first and last quilting I did until the end of 2009. It's funny to think of how hard this block was for me to cut and piece as a beginner. I still am a beginner, but the other three blocks came together so much quicker now that I sort of know what I'm doing.


These are the variations that I came up with.


This one's my favorite.


I'm not sure how big I'll end up making the quilt at this point. It will for sure have 12 stars with sashing in between. I think that will probably be big enough, but I think I want to make it for my daughter's twin bed (when she gets one...she's still in a crib).

***************

I also worked on the blocks for my Make Life quilt. Forty down, forty to go.


Here's what some of the pieced blocks look like, minus the inch I have to trim to make them nine inches square. (I hate wasting fabric, so maybe I can incorporate that one-inch strip somehow. And, I don't know why this image is sideways; I didn't take it in portrait mode.)


I'm debating how big to make this one too. I have enough to make it 72x90 with a five-inch border all the way around, but I'm not sure I want it that big. I'm thinking maybe closer to 63x72 or something around there. Once I get most of the blocks sewn together, I'll lay it out and see if the smaller size looks right. No need to sew all 80 blocks if I don't end up using them all.

LinkWithin

Related Posts with Thumbnails