Showing posts with label paper piecing. Show all posts

Wednesday, August 13, 2014

WIP Wed 8/13/14: The one with all the quilt top beginnings

Now that I'm back into the swing of sewing again, I want to try harder to blog. I have a tendency to post things to Instagram because it's so quick and easy, but I forget that my blog serves as a sewing journal so I can document all the things I make. Needless to say, these pics are all from my IG feed (@pitterputterstitch). 

Let's get on with the WIP part of this post, eh?

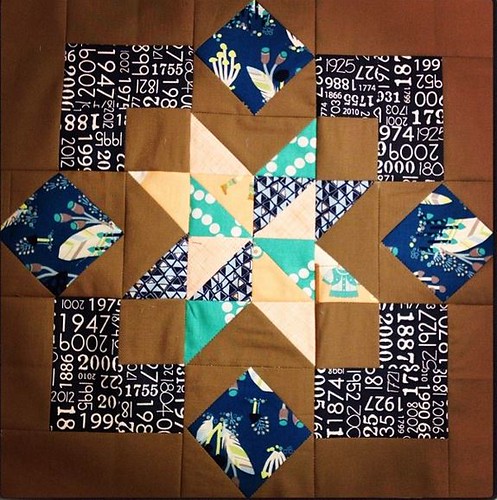
Flower Box
Flower Box 1

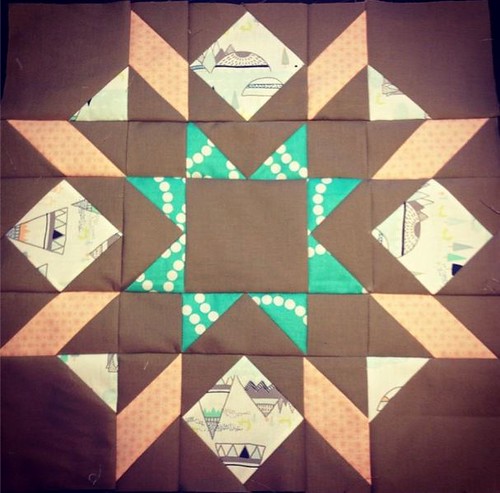
I bought this V & Co pattern, which I really love, and then pulled together a group of navy, teal, and peach fabrics. For the background, I picked this Moda Bella teak, and I'm not sure I love it. In fact, I think I may not like it. I'm debating between recutting my background fabric using a lighter neutral or just pushing through and finishing the blocks as is.
Flower Box 2

Arkansas Florence Crossroads

This was such a fast top to put together. I used Denyse Schmidt's Florence with coordinating solids for the main blocks and Le Creme dots for the background. I plan to make another one of these soon.

Arkansas Florence Crossroads

New Star

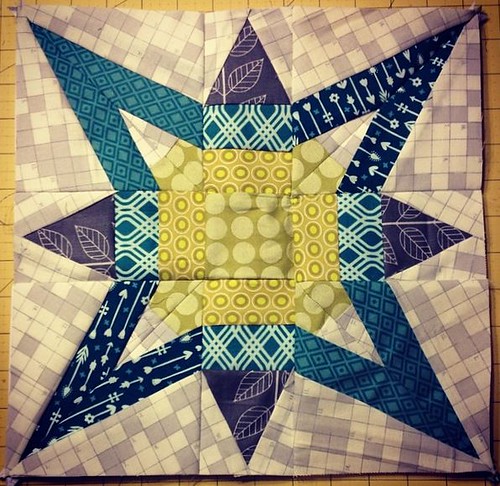
This paper pieced star is called the New Star and I got the pattern from Quilter's Cache. The Salt Lake Modern Quilt Guild is making a charity quilt using paper pieced stars and this color scheme. When I made this block, I forgot to use the designated solid background, so lucky me, I get to keep this one. It'll turn into a pillow eventually.
Paper Pieced Star

Neon Plus

In an effort to make a quilt for everyone in my family, I started on this neon plus quilt for my niece, Chamy. She's 19 and loves neon. When my dad was sick, she spent a lot of time at my parents' house tackling projects that needed to be done. She even refinished my parents' 11x40 foot deck! She's awesomesauce so I wanted to make her a quilt right away.

Neon Plus

Wee Wander Pink and Orange

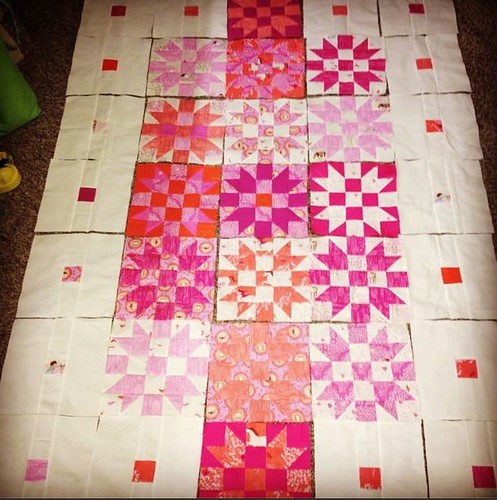
When Sarah Jane's Wee Wander line came out, I bought a fat quarter bundle of the whole line. This is such a sweet collection and I wanted to make coordinating quilts for my two girls. I played around with layouts and really liked this one, but The Middle has a mind of her own and convinced me to change it up. I'll post the final layout when I can take real pictures with my camera.
Wee Wander Pink and Orange

Wee Wander Blue and Green

For The Baby's quilt, I made a variety of patchwork blocks. I've since sashed them all in a cream solid and then I'll add a border around each block with green and blue solids.
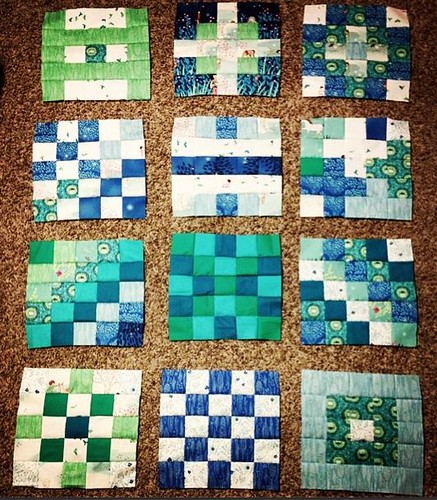
Wee Wander Blue and Green

Strips

I haven't made a small-strip striped quilt before. I pulled a focal fabric and then grabbed blues, reds, oranges, and greens to go with it. I pressed and trimmed all these blocks last night and settled on the final layout. I'll piece the top tonight. That'll put me at five quilt tops to baste, quilt, and bind. Not bad for a month's worth of sewing.
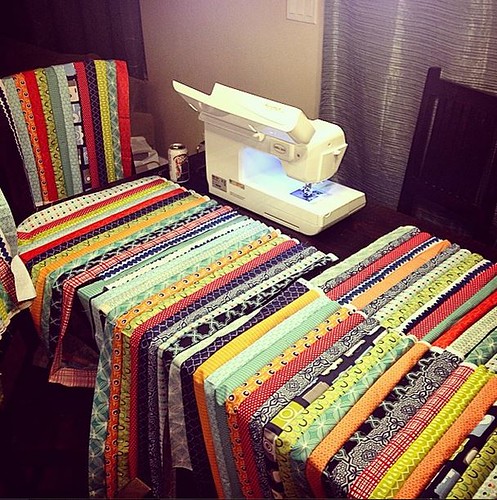
Strips

Thursday, January 31, 2013

Finished Circle of Circle of Circle of Flying Geese Quilt

April has been my month in the Sew Beautiful Bee. In 2011, I asked my bee mates to make me circle of flying geese blocks using yellow, green, blue, and gray fabrics. It was fun to see the blocks begin to show up in the group photo pool.

Sew Beautiful Bee Blocks for Me

A year later, in April 2012, I finally got my act together to piece the center double circle of flying geese block and then pieced all the blocks together.

Circle of Circle of Circle of Flying Geese

Then that quilt top sat for several more months until I finally pieced the back. By this time, Christmas was approaching and I knew I'd have to put it aside again. As the year came to a close, I decided that if I wanted to make a quick dent in my WIPs, I needed to be okay with the idea of sending some quilts out for quilting. (Before this past Christmas, the only longarm quilting I'd had done proved to be a bad experience. While the quilting looked nice, the lady charged me double what she quoted me PLUS she was really condescending about the design and fabric selection - not her style I guess, but she should have just kept her opinions to herself.)

Anyway, I talked with my good friend, Kayli, about doing the quilting for me and I think she did a great job! I really wanted there to be circles in the quilting since the whole design is circles upon circles. I really love the design she did and it wasn't something I had seen before.

Circle of Circle of Circle of Flying Geese Quilting


She also added two layers of batting, so not only is the quilt nice and heavy and warm, but the quilting really stands out. And with all that white space, it's even cooler!

Finished Circle of Circle of Circle of Flying Geese

There were two blocks comprised of three colors, so I put those on the back with three colors of Lizzy House's Pearl Bracelets. (See? More circle repetition!) I also included the quilt label that Lee made for everyone in the bee that has all of our names and locations on it.

Finished Circle of Circle of Circle of Flying Geese

I made a scrappy binding of yellow, green, blue, and gray prints. (I'm really loving scrappy bindings right now!)

Quilt Stats

Size: 70x70 before washing
Design: Circle of Flying Geese paper piecing template found here; Double Circle of Flying Geese paper piecing template designed by Lynne of Lily's Quilts; design arrangement by me
Quilting: Kayli Taylor

Sunday, November 18, 2012

Paper Pieced Kaleidoscope Tutorial

Way back in March, I saw this stunning quilt top on Rita's blog. I was absolutely awestruck and mentally jotted down "paper pieced kaleidoscope quilt" on my to-make list. Fast forward to round 9 of the Pillow Talk Swap (PTS9) when I was partnered with Adrianne of Little Bluebell. I've been a big fan of Adrianne's for a while now and really wanted to make something that she'd enjoy. In her description of what she'd like to receive, she listed simple, all-over design as being something she liked. Almost immediately, Rita's quilt top popped into my head and I came up with this pillow version. I've put together a little tutorial on how I made my PTS9 pillow. Let me know if you have any questions.

First, you need to determine the size of blocks you want to make. I wanted 4" finished blocks so I could easily make them work with a 16", 20", or 24" pillow form. You'll need to adjust the size of you paper if you want larger or smaller blocks.

Start with a 4x4" piece of paper. Line your paper up on your cutting mat and then begin drawing the following lines by rotating your ruler around the square.

Top left to bottom right - one inch in from both sides:

Foundation Paper Pieced Kaleidoscope Block Tutorial

Top right to bottom left - one inch in from both sides: (this image also shows my drawn line top left to bottom right of one inch down and one inch up)

Foundation Paper Pieced Kaleidoscope Block Tutorial

Top right to bottom left - one inch down and one inch up:

Foundation Paper Pieced Kaleidoscope Block Tutorial

Your finished block should have four criss-crossing lines on it and should look like this:

Foundation Paper Pieced Kaleidoscope Block Tutorial

Next, align your ruler with one of the drawn lines (it doesn't matter which one), and cut the square into two halves.

Foundation Paper Pieced Kaleidoscope Block Tutorial

Then, paper piece your desired fabrics onto one half of the paper. Since we used a 4" square, which is our finished size, make sure you have plenty of fabric on the outside edges of the paper for trimming. For paper piecing basics, check out this post or do a web search for "paper piecing" (not to be confused with "English paper piecing") - there are plenty of posts and videos out there to help you if you've never tried paper piecing before.

Foundation Paper Pieced Kaleidoscope Block Tutorial

Repeat with the other half of your 4" square.

Foundation Paper Pieced Kaleidoscope Block Tutorial

Now it's time to square up both halves. Place your 1/4" mark on your ruler on each edge of the paper and trim. This is your seam allowance.

Foundation Paper Pieced Kaleidoscope Block Tutorial

Each trimmed half should look like this:

Foundation Paper Pieced Kaleidoscope Block Tutorial

Foundation Paper Pieced Kaleidoscope Block Tutorial

Align your two halves so the long diagonal edges of each paper match up, right sides together. Stitch just along the edge of the paper. (Sorry, I forgot to take a picture of this.)

Press your seams and remove the paper on the back. Here's what your finished block will look like:

Foundation Paper Pieced Kaleidoscope Block Tutorial

You can then repeat the above steps to make as many blocks as you like. Arrange the blocks as desired. Sew the blocks into rows and the rows together to make a pillow or quilt top.

PTS 9 - Paper Pieced Kaleidoscope

For my PTS9 pillow, I made 16 blocks and laid them out in a 4x4 layout. I then added a thin white border and then a thicker border to achieve my desired pillow top size.

Finished Pillow Talk Swap Round 9 Pillow

I was really pleased with how this pillow came together. I really want to make a quilt using this technique, but with larger block sizes. Perhaps that's something to put on 2013's to-do list.

Friday, October 5, 2012

Gearing up for Pillow Talk Swap #9

The mister thinks I'm crazy (since I have SO many projects in the works right now), but I couldn't resist signing up for round 9 of the Pillow Talk Swap. It is probably my most favorite swap on Flickr. The talent pool is amazing and I've been so so happy with the two pillows I received in previous rounds.

In stalking my partner, I came up with a design that I think she'll like: repeating kaleidoscope blocks.

PTS 9 Idea

I drafted a paper piecing pattern so I don't have to use templates. Each quadrant finishes at four inches, so I'm planning on making 25 blocks for a 5x5 layout (20 inches tall by 20 inches wide).

PTS 9 - Paper Pieced Kaleidoscope

I've only made four blocks so far, but I wanted to give my partner a better idea of what the pillow top will look like. I photoshopped the above image to get this one:

PTS 9

The color placement will obviously be different with the actual blocks, but they'll each consist of red, yellow, green/aqua, dark gray, with a light gray (Kona ash) background.

PTS 9 In progress (top image: 4 blocks; bottom image: edited layout 20 blocks)

This isn't one of my familiar, typical, comfortable color schemes (and part of me keeps thinking about the German flag), but I'm really liking how it's coming together so far. I'm becoming more and more comfortable with paper piecing, and this project will provide a lot more practice!

Fabrics include:
Denyse Schmidt's Chickopee
Rashida Coleman Hale's Washi
Kona Ash, Charcoal, and a few other greens that I can't remember the names of
Robert Kaufman's Metro Living
Annela Hoey's Little Apples
Lucy Summers' Summersville
Bonnie and Camille's Vintage Modern
Riley Blake (I can't find the name of that other yellow print, but I'll look for it)

Friday, September 14, 2012

August/September Bee Blocks and Other Random Sewing

August was Megan's month in the Sew Beautiful Bee. She asked for Lone Starburst blocks. She sent a bunch of really bright fabric scraps and asked us to follow the tutorial found at the Six White Horses blog here. I loved, loved, loved making this block! I usually start to sweat a bit when asked to paper piece, but this one was very doable for me and I had a lot of fun with it. I'll definitely be making some of these for myself in the near future!

Lone Starburst Block for Megan

AnneMarie's turn was next for September. She asked for improv hexagon blocks inspired by Angela's block here. AnneMarie sent a bunch of Japanese import prints. It was fun to fussycut these fabrics for the hexagons.


Improv Hexi Block for AnneMarie

While perusing Instagram, I saw Rae's maxi version of her Washi Dress and just about died. I stalked her blog for a couple days, anxiously awaiting the release of her pattern. I snagged one and quickly bought fabric to make a Washi Tunic and a Washi Maxi. Here's my "quick, honey, take a picture of my shirt with my phone" photo. I haven't tackled the maxi yet, but I am please with how the tunic version came together.

Washi Tunic

My older daughter is at the age where not only does she love to wear skirts and dresses, but she likes wearing things that I've made for her. I want to take advantage of that for as long as I can since I know all too soon she'll refuse to wear anything I make for her or even hint at thinking is cool, because of course anything Mom thinks is cool will be the complete opposite. Several Saturdays ago, she wanted to wear a skirt (of course), and I sadly, but not surprisingly, was behind on laundry. I pulled out some Heather Ross Crafy Chloe Pin People fabric and made a quick 10-minute skirt. My daughter's friend wanted to play, and when she got to our house, she saw me making the skirt for my daughter. She asked if I'd make her one too. I tried to hide my huge goofy grin, said, "Sure," and asked her what her favorite color is (pink). I finished my daughter's skirt, she got dressed, and the two girls went out to play. I then ran upstairs, found some pink fabric, and whipped together another 10-minute skirt for the friend. (I noticed she was wearing it yesterday when she came over to play...my heart sang!)

Crafty Chloe Pin People Skirt

I mentioned earlier that paper piecing makes me nervous. But, I've really come to love English paper piecing (EPP). I've been accumulating supplies over the last couple months and decided it was about time I make a zippered pouch to store my paper pieces in. For this pouch, I cut two 10x10 inch squares from Melody Miller's Ruby Star Shining typewriter fabric and two 10x10 inch squares from Joel Dewberry's Deer Valley Lodge Lattice in Azure fabric, and used a 10 inch zipper. I boxed the bottom of the pouch, making the finished bag about 8 inches wide by 9 inches tall. It's the perfect size (for now), and it's great to have all my EPP supplies in one place.

Zipper Pouch for EPP Supplies

Well, thanks for making it through that hodgepodge of a post. I have a couple more finished quilts to show over the next little bit. Have a good weekend, everyone!

Wednesday, September 12, 2012

September 11, the day after

So I meant to post this yesterday because it would have made better sense, but I was distracted by a sick baby.

September 11 is kind of a bummer day here in the states because of the World Trade Center attack. It's also the day I had my miscarriage a couple years ago. To top it all off, my bestie cousin started chemo yesterday for ovarian cancer. She had to have a complete hysterectomy and has not yet had the opportunity to have kids. She's only 32.

I found out she was scheduled for chemo a couple weeks ago. My mom is a breast cancer survivor (20 years now - go Mom!) and I remember her talking about how cold she'd get during her chemo treatments. So, I thought my cousin could use a quilt. Not only to keep her warm, but maybe lift her spirits and remind her that she has a lot of people thinking about her and cheering her on. To remind her to have

Kill that Cancer Finished Quilt Back Detail

I pulled together a bunch of fabrics and cut 12.5" squares. Simple, big patchwork. I used fabrics from Lizzy House, Riley Blake, Tula Pink, Laurie Wisbrun, Momo, American Jane, Heather Bailey, Doohikey Designs, Denyse Schmidt, Joel Dewberry, Emily Herrick, and others.

Kill that Cancer Finished Quilt

For the back, I paper pieced "hope" using the wonky alphabet pattern from Kelbysews and added a DS Quilts print from one of her Joann's lines, a Lizzy House Pearl Bracelets print, and a Joel Dewberry print from Modern Meadow.

Kill that Cancer Finished Quilt Back

I quilted it in meandering double loops and bound it in a plaid from Play Ball from Riley Blake.

The quilt measures about 60"x60".

LinkWithin

Related Posts with Thumbnails